Oh my gosh, do you remember those brightly colored squares we used to shove in the toaster as kids? They were such a treat, right? Honestly, even now, finding that perfect, nostalgic crunch in the morning is exactly what I crave. But let’s be real—the store-bought ones can be a little… flat. That’s why when I decided to tackle homemade toaster pastries, I knew the *flakiness* had to be perfect. Trust me, making incredible **Pop Tarts With Peanut Butter** from scratch is totally worth the tiny bit of extra effort.
The game changer, I learned very quickly, is all in the dough. You can’t just throw everything together; you need that precise mixing method to keep the butter cold. Once you nail that pastry, the homemade peanut butter filling is just pure joy. Forget the overly sweet frosting; we’re aiming for buttery, shatteringly crisp layers that melt in your mouth.
Assembling Your Ingredients for Pop Tarts With Peanut Butter
Okay, before we get our hands a little dusty, let’s look at what we need. Making **Pop Tarts With Peanut Butter** really boils down to two main teams: the dough squad and the filling/glaze crew. It might look like a long list, but it’s all standard stuff you probably have hanging around.
The star of the show for that incredible flakiness is definitely the butter. If that butter isn’t rock solid cold, the whole dough structure leans toward chewy instead of delicate and flaky. I’m serious about the temperature here—it’s one of my non-negotiable rules for amazing homemade pastry!
For the Flaky Pastry Dough
For this crust, you need to keep things frosty. We want the butter to stay in little distinct pieces so it steams and creates those gorgeous layers while baking. Grab these items:
- 2 1/2 cups All-purpose flour
- 1 tsp Salt
- 1 cup Unsalted butter, which has to be **cold and cubed**—get it nice and hard!
- 1/2 cup Ice water, and only add what the dough tells you it needs.
For the Peanut Butter Filling and Glaze
This is where we get to the good part! Notice the powdered sugar is split up—that’s important. We mix some into the filling to make it spreadable but firm, and we save the rest for that sweet, sweet finish.
- 1 cup Creamy peanut butter (Use your favorite brand!)
- 1/4 cup Powdered sugar, strictly for the filling right now
- 1 cup Powdered sugar, reserved for that final drizzle of glaze
- 2 tbsp Milk or water, just enough to get the glaze pouring nicely
Making the Perfect Pastry Dough for Pop Tarts With Peanut Butter
Creating that shatteringly flaky crust for homemade **Pop Tarts With Peanut Butter** is honestly my favorite part of this whole process. This is where we build trust between the butter and the flour—if you treat the dough gently now, it pays you back tenfold in the oven! We are using the food processor here because it’s fast, but even if you use your hands, the principle is the same: don’t overwork the butter.
If you want to see some other fun baking tips and tricks while your dough is chilling, check out some of my baking adventures over on the blog! It’s all about learning the ‘why’ behind the ‘what’ in the kitchen.
Mixing the Dough Base
First thing is to get the dry stuff moving. Toss the flour and salt right into the food processor bowl and give it a quick pulse just to marry those two ingredients. Now, add in your super cold butter cubes. You want to pulse this baby until it looks like coarse cornmeal with some chunks still hanging out looking like little peas—no bigger than that, though!
Those pea-sized bits of butter are the secret sauce! As they hit the hot oven, they melt away, creating pockets of steam that push up the dough layers. If you mix until it’s just one uniform sandy texture, you’ll get a cracker, not a pastry.
Chilling the Dough
Once the butter and flour are acquainted, it’s time to introduce the ice water, just a tablespoon at a time, pulsing between each addition. Stop as soon as the dough starts clinging together when you pinch it—it shouldn’t look smooth, just shaggy and ready to hold a shape.
Divide that shaggy mass right in half and press each piece into a flat disk. Don’t even *think* about kneading it! Wrap those disks up tight in plastic wrap. They need at least 30 minutes chilling in the fridge. This resting period is mandatory; it relaxes the gluten so your pastry doesn’t fight you when you try to roll it thin later on! Keeping everything cold is the ultimate key to success here.
Assembling and Sealing Your Pop Tarts With Peanut Butter
Now that our dough is nice and cold—gimme about 400 degrees on the oven, folks!—it’s time to make these look like actual toaster pastries. This assembly stage is where you need a little focus. We want tight seals so that creamy peanut butter filling stays safe inside where it belongs, bubbling happily instead of oozing out onto your baking sheet!
This whole process went surprisingly fast the first time I tried it, much faster than I expected for something this delicious!
Rolling and Filling the Pastries
Dust your counter lightly—and I mean *lightly*—you don’t want to dry out that beautiful chilled dough. Take out one disk of dough at a time (keep the other one chilling, seriously!), and roll it out evenly until it’s around 1/8 of an inch thick. It doesn’t have to be perfect, but try to get it pretty thin.
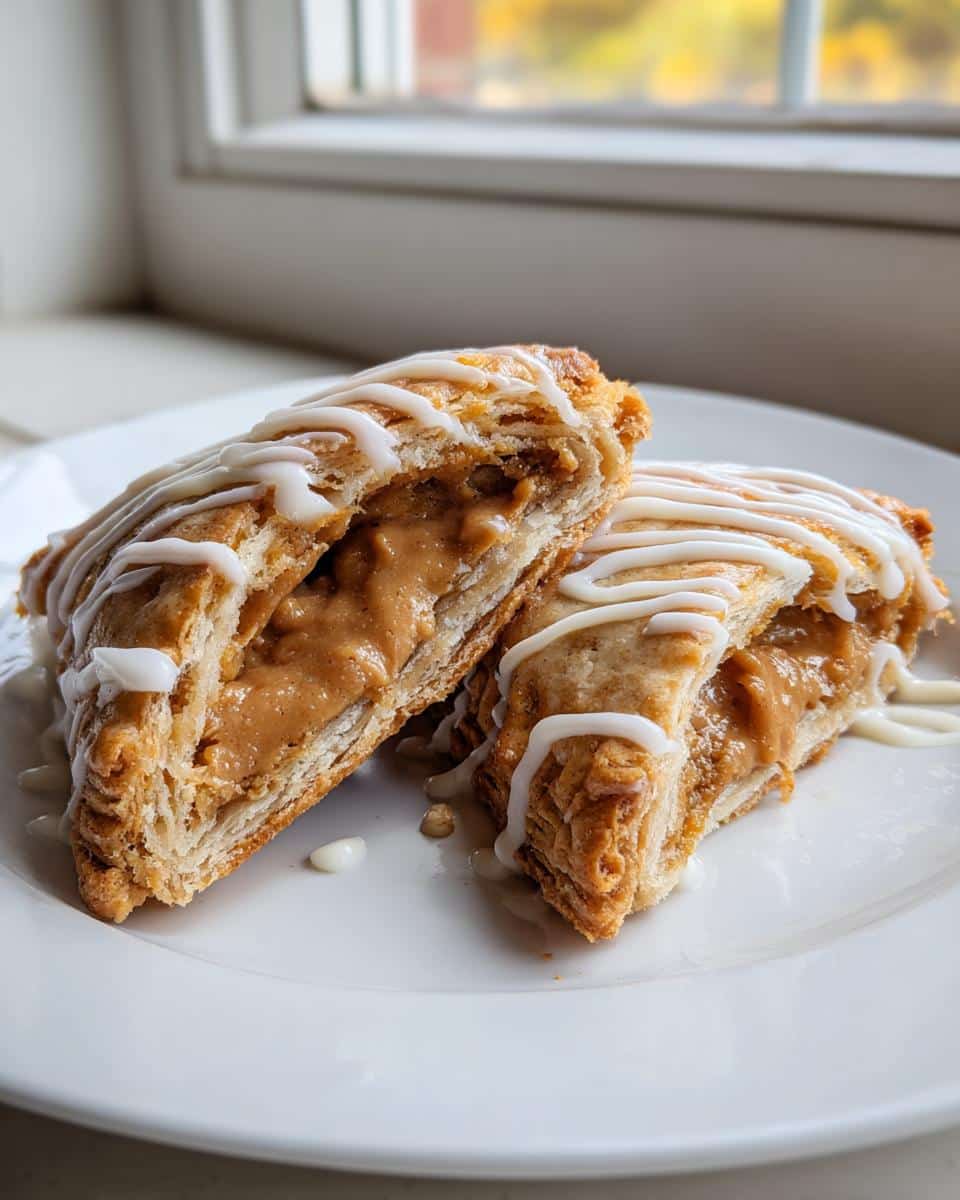
Use a pizza cutter or a sharp knife to cut your rectangles. I usually aim for about 4 inches by 3 inches. That gives you a nice, handheld snack size. Now, take a spoonful of that thick peanut butter filling we mixed up and carefully place it onto one half of each rectangle. Leave a good border all the way around the edges—this is vital for sealing later on!
Before placing the top layer on, grab a little wet paintbrush or even just your fingers and lightly brush water all along that empty border. That water is like edible glue for pastry!
Crimping and Venting for Baked Pop Tarts With Peanut Butter
Take your second dough rectangle and gently lay it right over the filled piece. Now, press those edges together with your fingers first. Make sure you squeeze out any air pockets, too! Once you’ve got a decent seal, grab a fork. You press the fork tines firmly all around the perimeter. That crimping action locks everything down tight and gives us that classic look.
Here’s the part everyone forgets: steam! If you don’t let the steam escape, your pastry might blow out in the oven, spilling your glorious filling everywhere. Take a small paring knife or even the tine of your fork and carefully cut two small slits right in the center of the top layer of each pastry. That lets the steam vent quietly while baking your **Pop Tarts With Peanut Butter** to perfection!
Baking Instructions for Perfect Pop Tarts With Peanut Butter
Okay, the assembly is done, and those little pockets of peanut butter goodness are sitting pretty on the baking sheet—and yes, you absolutely must use parchment paper! Cleaning up pastry crust when it sticks is the absolute worst.
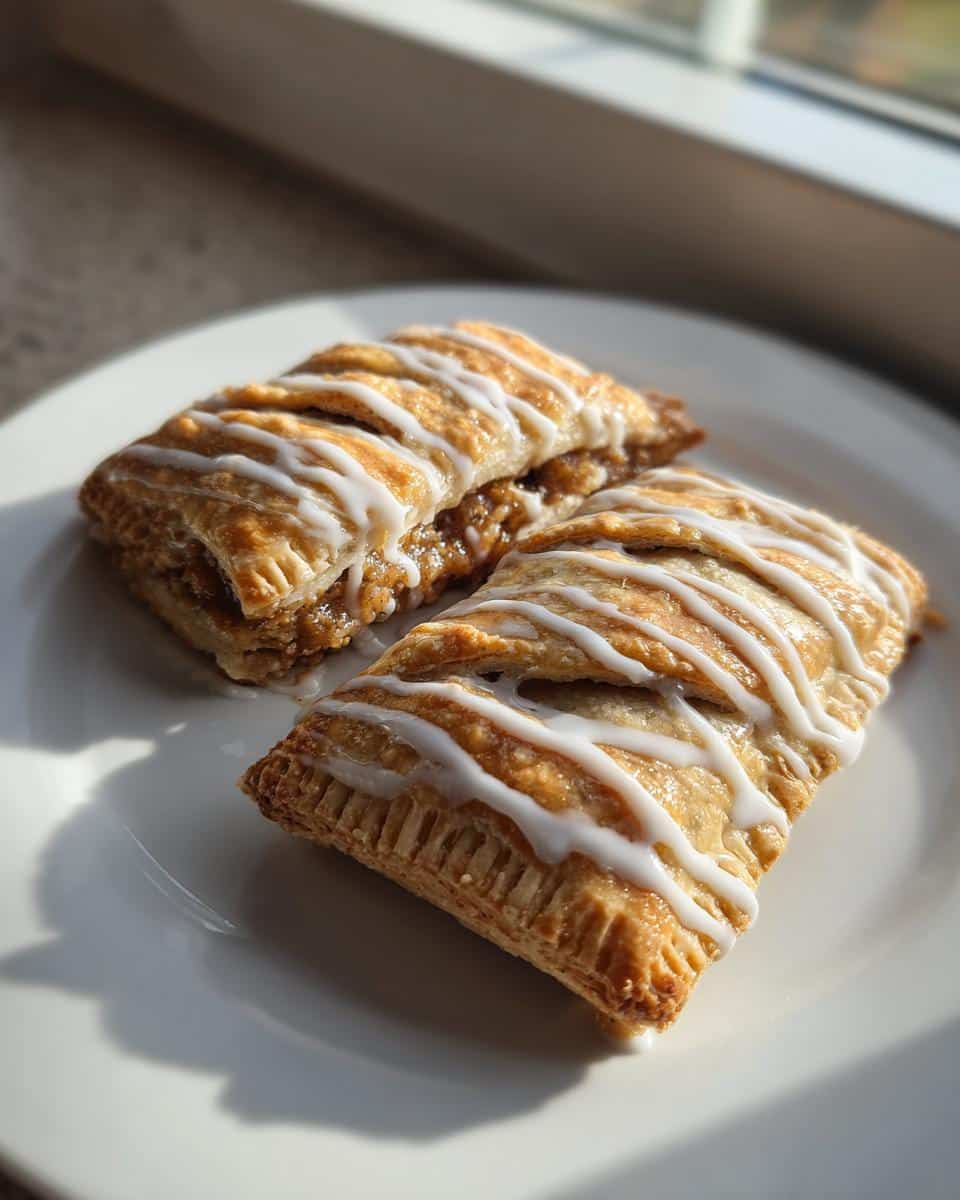
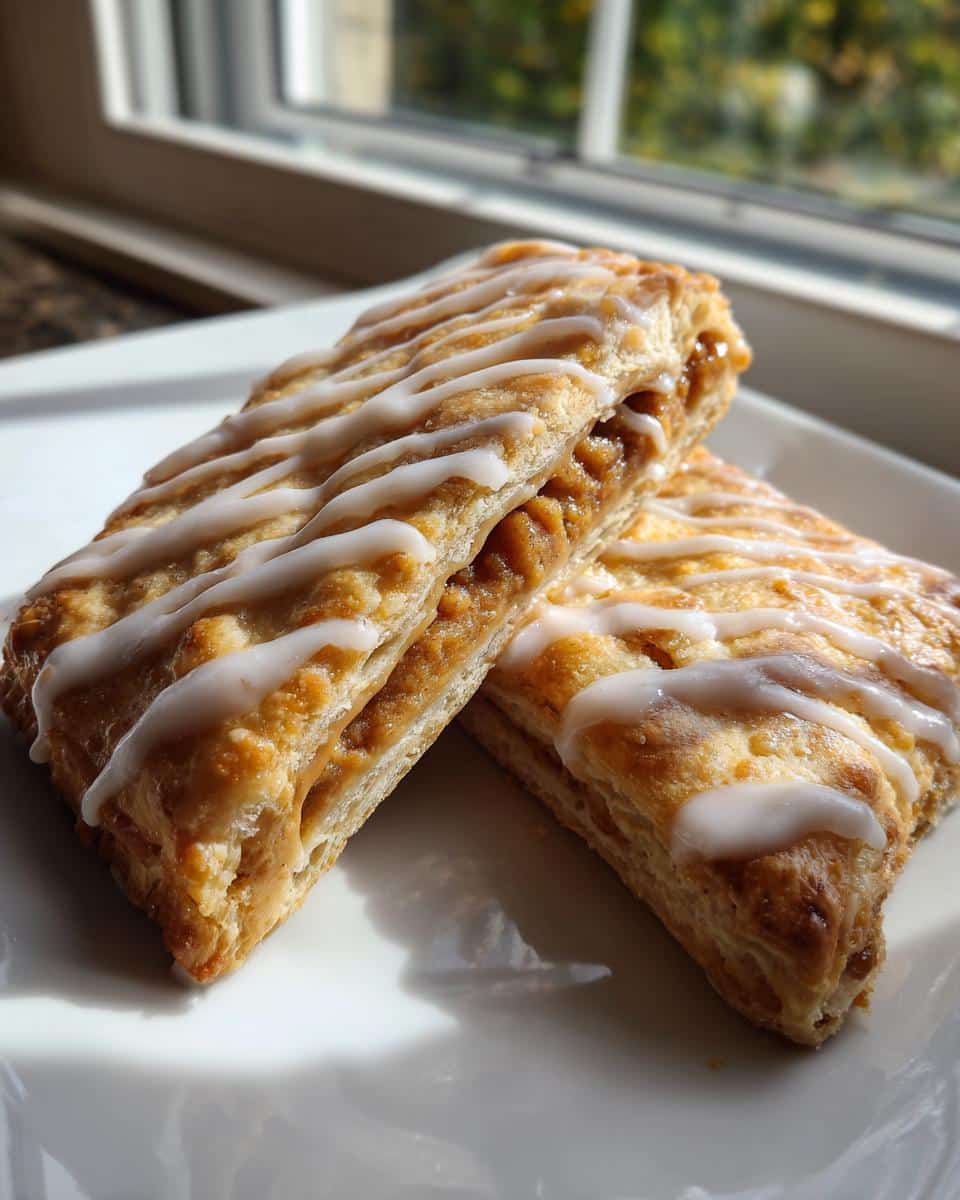
Time to slide them into an oven already preheated to 400 degrees Fahrenheit (that’s 200 degrees Celsius, for my friends using the metric system). You only need about 12 to 15 minutes. What you’re looking for is that beautiful, light golden brown color on top. Don’t overbake them or the crust will be too hard!
When they come out, they’ll smell incredible. Let them cool just for a minute or two on the sheet while you get the glaze ready. That little bit of cooling time really helps them set up nicely before we start drizzling!
Creating the Simple Glaze for Your Pop Tarts With Peanut Butter
The baked pastry is lovely on its own, I swear, but the glaze is what really pushes these homemade **Pop Tarts With Peanut Butter** into that ultimate breakfast territory. Don’t worry, we aren’t trying to make complicated royal icing here; we want something that sets up quickly but still keeps that lovely, almost sugary crust.
This glaze comes together in literally 30 seconds. While the pastries are cooling down for just five minutes—you want them warm, not piping hot—whisk together that remaining cup of powdered sugar. You need to add your milk or water *slowly*. Seriously, start with just one tablespoon, whisk it like crazy, and see how it looks.
I always add the liquid just a tiny bit at a time until I reach that perfect consistency where it’s pourable but still thick enough to coat a spoon. If it looks too runny, just toss in another spoonful of powdered sugar. If it looks rock hard, add a drop more milk. It’s all about instinct here!
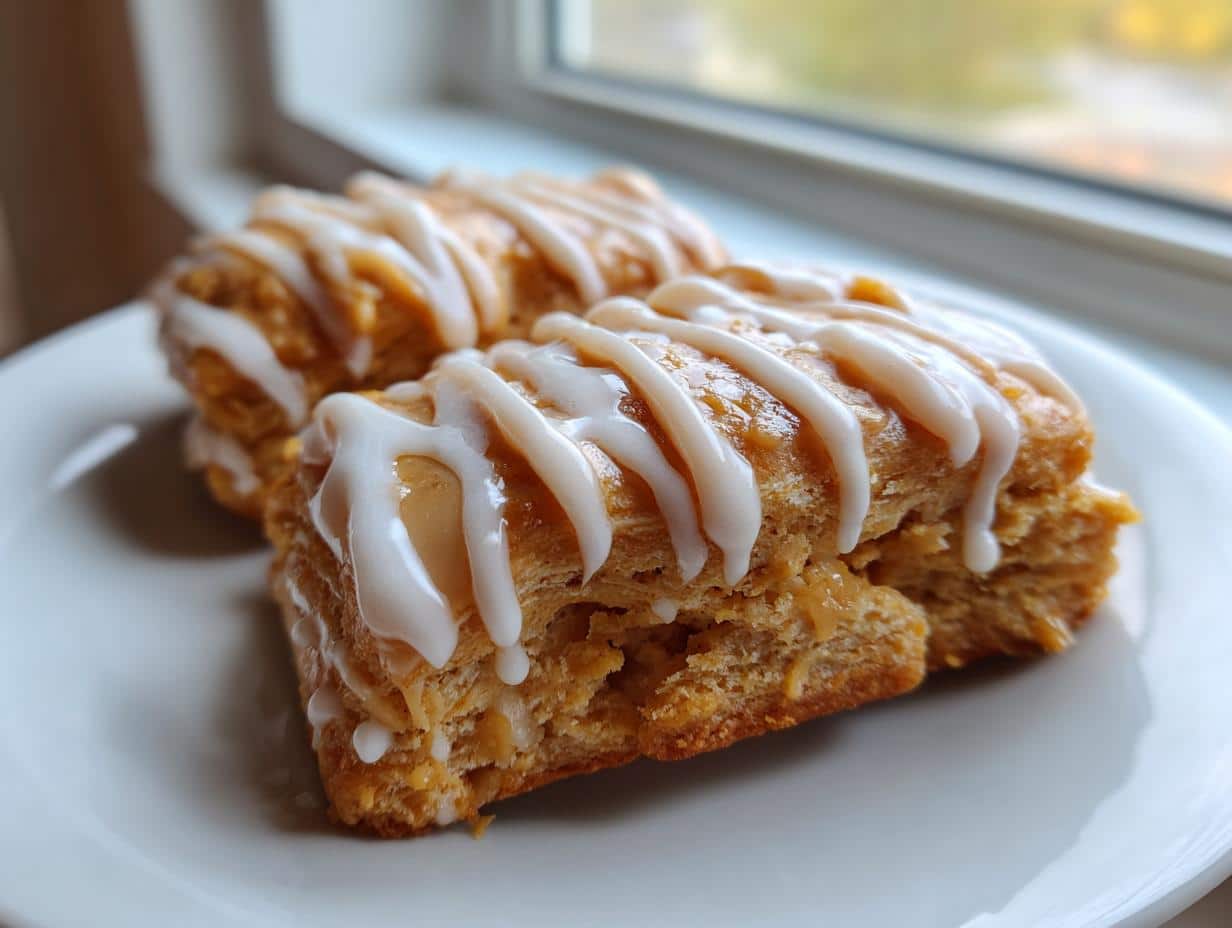
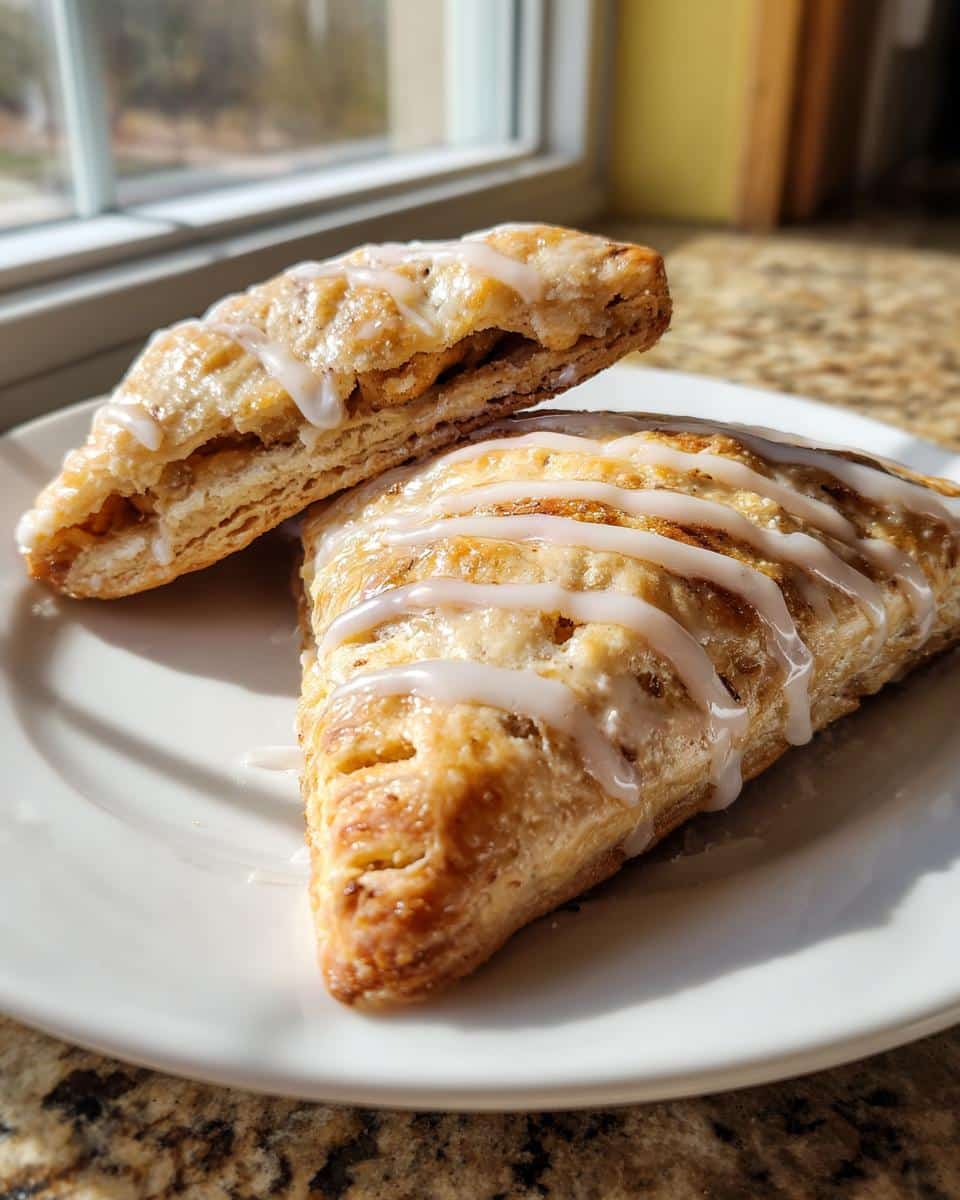
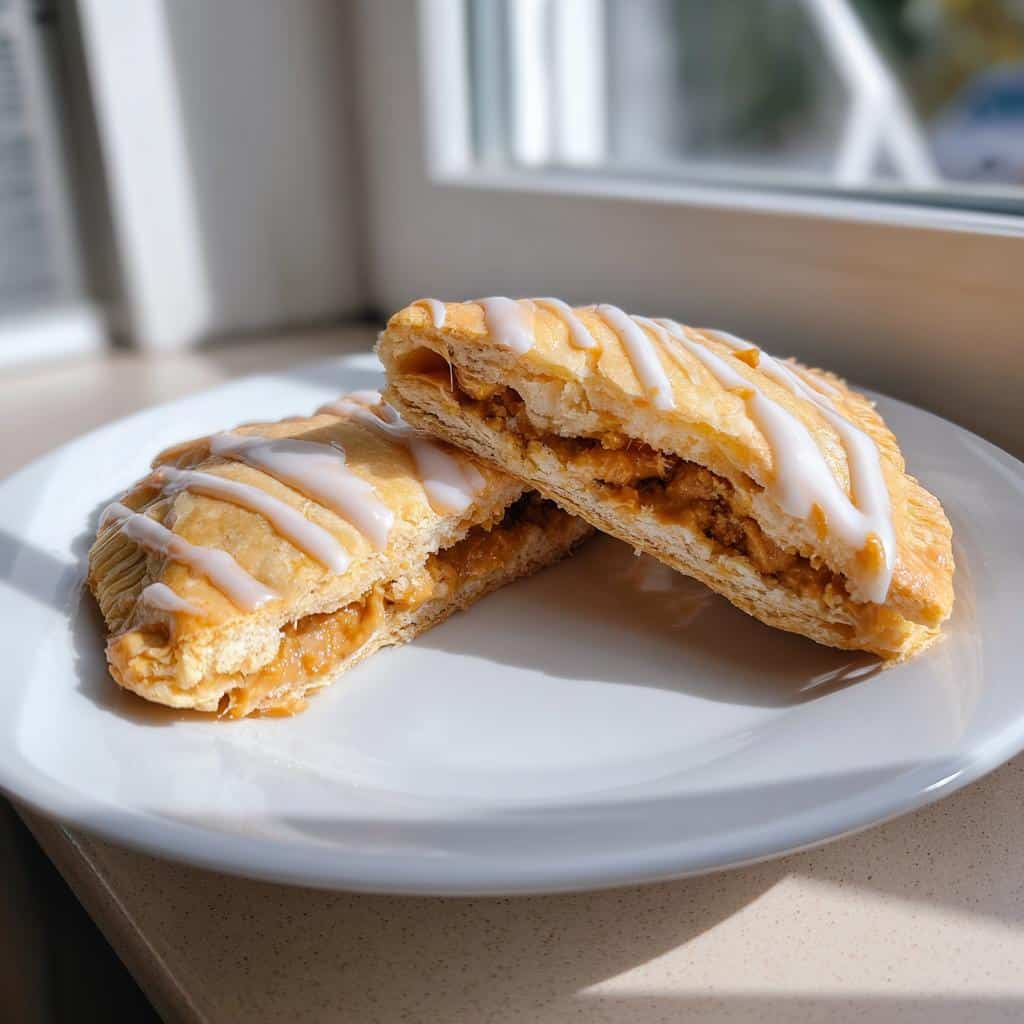
The texture magic happens when you drizzle it over the warm pastries. The slight warmth of the crust softens the glaze just enough so it sinks in ever so slightly, giving you that amazing textural contrast when you bite in—flaky crust, slightly soft glaze, and that rich peanut butter center.
Use a spoon or even a fork to drizzle it back and forth over the tops. Some people like to dip the top third right into the bowl, but I find drizzling gives you more control, especially when you have eight perfectly shaped pastries waiting for their sweet topping!
Tips for Success When Making Pop Tarts With Peanut Butter
Honestly, making these homemade **Pop Tarts With Peanut Butter** is pretty hard to mess up, but I have learned a few things the hard way! Remember I told you about that time the filling totally oozed out and made a sticky, brown mess all over the parchment? Oops. That happened because I didn’t really press the fork down hard enough when crimping those edges.
So, tip number one: really, *really* press down with that fork. You want to see the pattern imprinted on the top and bottom layers compressing together. That seal is your defense against leakage!
If you want a really beautiful, shiny top that looks like the fancy bakery versions, try this: keep the top layer plain (no glaze for now), but brush the entire top surface with a quick egg wash—just one egg beaten with a teaspoon of water. It gives them this gorgeous, deep golden shine when they bake. If you want more snack inspiration after these, I compiled a list of easy appetizers and snack ideas that might hit the spot!
Another thing? Don’t let the pastry sit around after you’ve cut the vents. The longer you wait, the more the cold butter melts, and the soggier your bottom crust might get before it even hits the oven. Get those little rectangles into that 400-degree heat right away!
Storage and Reheating Pop Tarts With Peanut Butter
So, unless you’re hosting a massive brunch party, you’re probably going to have some leftover homemade **Pop Tarts With Peanut Butter**, and that’s great news! The good thing about pastry is that it reheats beautifully, provided you use the right method.
For storage, these stay fresh quite well because of that thick peanut butter filling. If you filled them and they don’t have the glaze on yet, just wrap those naked pastries tightly in plastic wrap or tuck them into an airtight container. At room temperature, they should be perfectly good for about two days. If you need them to last longer, absolutely pop them in the fridge; they’ll keep well for a solid week that way!
Now, the reheating part is where you save the day and keep that flaky crust experience alive. Don’t even *think* about the microwave if you want to keep the crispness factor high! A microwave will heat them up, sure, but it also turns that gorgeous, flaky dough into something soft and a little sad.
The absolute best way to eat these straight from the fridge or after a day on the counter is in the toaster oven. Seriously, set your toaster oven to a medium setting, or bake them at about 325 degrees Fahrenheit for maybe 3 to 5 minutes. You just want to warm the filling through and crisp up the edges again.
If you’ve already glazed them? A toaster oven is still your best friend! Just watch carefully because the glaze might get a little soft or sugary if it gets too hot, so keep an eye on those centers. That little bit of heat brings out the peanut butter flavor perfectly, making it taste like you just pulled them straight out of the oven!
Frequently Asked Questions About Homemade Pop Tarts With Peanut Butter
I totally get it; sometimes you just have a quick question pop up while you’re gathering your ingredients! People ask me all the time about swaps or what happens if they mess up a step. Here are some of the most common things curious bakers want to know about tackling these homemade **Pop Tarts With Peanut Butter**.
Can I use crunchy peanut butter in these Pop Tarts With Peanut Butter?
Oh, you absolutely can! If you love that little bit of texture, crunchy peanut butter works perfectly fine in the filling. Just know that because the crunchy bits don’t mash down quite as smoothly as the creamy kind, your filling texture will be slightly less uniform. Think “chunky” instead of “smooth.” It’s still delicious, just a different mouthfeel!
What is the best way to prevent the pastry from shrinking while baking?
This happens when the butter in the dough warms up too much before it hits the heat source. The number one answer is making sure your dough is ice cold when it goes into that 400-degree oven! If you roll it out and you feel like it’s getting soft or greasy while you’re cutting the shapes, just put the cut rectangles onto the parchment for five minutes in the freezer before baking. That quick chill tightens everything up and stops the shrinking!
How long will these toaster pastries last?
Since we aren’t loading these homemade **Pop Tarts With Peanut Butter** up with preservatives, they won’t last as long as the ones in the foil packets, for sure. If you keep them stored in a truly airtight container at room temperature, they are best enjoyed within two full days. After that, the crust starts to lose its prime crispness. If you need them to last up to a week, toss them in the fridge in that sealed container. They taste fantastic cold, too!
Share Your Homemade Pop Tarts With Peanut Butter Creations
Whew! I hope you’re walking away from your kitchen with a tray of warm, sticky, incredibly flaky **Pop Tarts With Peanut Butter**! Seriously, nothing beats that first bite when the crust shatters and you get that rich, salty-sweet filling.
Now, my favorite part of sharing these recipes is seeing what you all do with them! Did you stick to the classic peanut butter filling? Or did you sneak in some chocolate chips into the center of your toaster pastries? I want to know every detail!
If you tried this recipe and loved the flaky dough, please don’t forget to pop back over here and leave me a little star rating! That truly helps other bakers know they can trust this technique for making the best homemade pastry.
And if you take a picture—and you absolutely should, because these look amazing drizzled with that glaze—tag me on social media! I love seeing your kitchen victories almost as much as I love eating the results. Happy toasting!
Homemade Peanut Butter Pop Tarts
Ingredients
Equipment
Method
- Combine the flour and salt in a food processor. Pulse a few times to mix.
- Add the cold, cubed butter to the flour mixture. Pulse until the mixture resembles coarse crumbs with some pea-sized pieces of butter remaining.
- Gradually add the ice water, one tablespoon at a time, pulsing until the dough just comes together. Do not overmix.
- Divide the dough in half, form each half into a disk, wrap in plastic, and chill for at least 30 minutes.
- While the dough chills, prepare the filling by mixing the peanut butter and 1/4 cup of powdered sugar until combined.
- Preheat your oven to 400 degrees Fahrenheit (200 degrees Celsius). Line baking sheets with parchment paper.
- On a lightly floured surface, roll out one disk of dough to about 1/8 inch thickness. Cut the dough into rectangles, about 4 inches by 3 inches.
- Place a spoonful of the peanut butter filling onto one half of each rectangle, leaving a small border around the edges.
- Brush the edges of the dough with water. Place a second dough rectangle on top of the filling. Press the edges together firmly to seal, then use a fork to crimp the edges closed.
- Cut two small slits in the top of each pastry to allow steam to escape. Place the pastries on the prepared baking sheets.
- Bake for 12 to 15 minutes, or until the crust is lightly golden brown.
- While the pastries cool slightly, whisk together the remaining 1 cup of powdered sugar and 2 tablespoons of milk to create a simple glaze.
- Drizzle the glaze over the warm pastries before serving.


