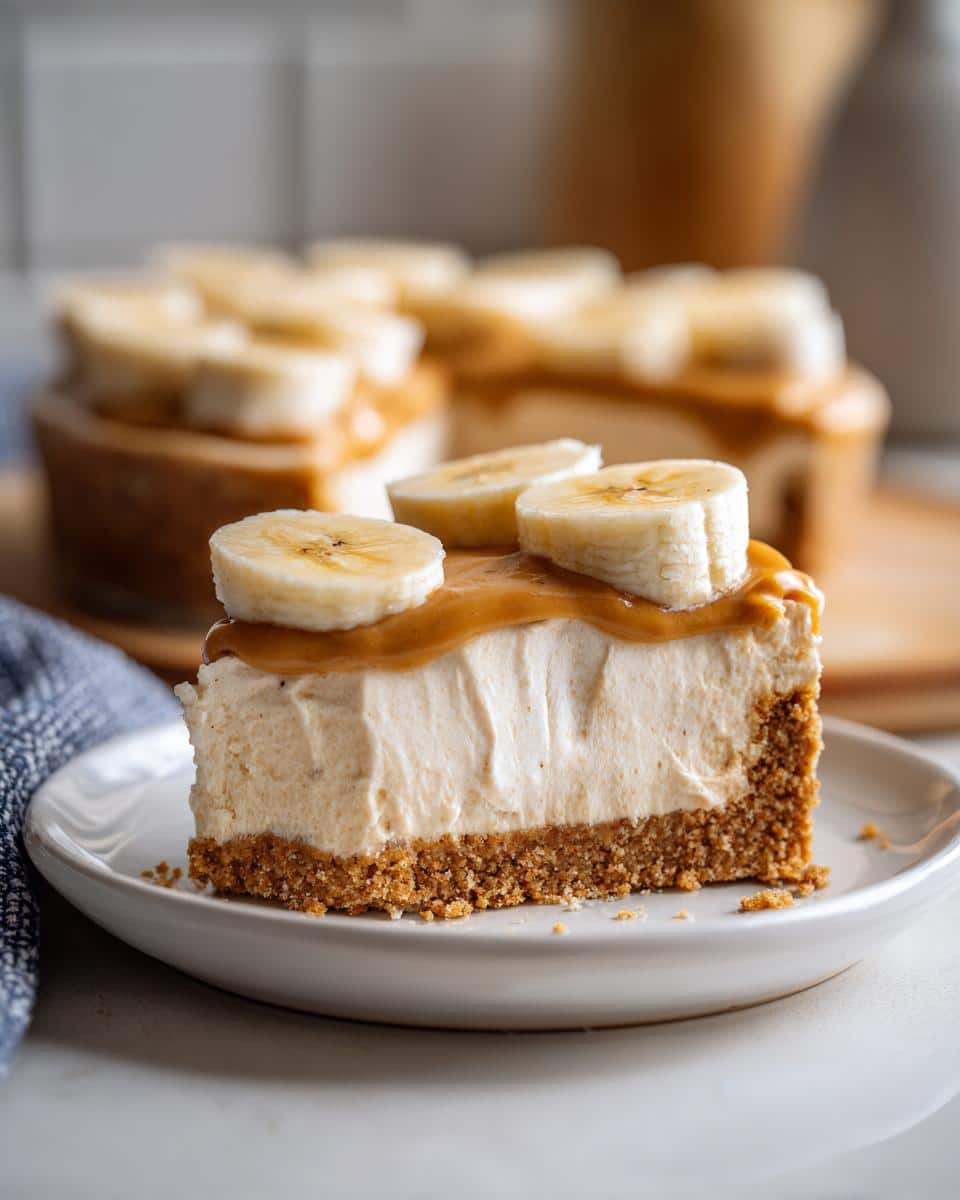
Oh, you know those days when the sun is just beating down, and the thought of turning on the oven feels like a personal attack? Me too! That’s why I live for quick fixes that taste absolutely luxurious, and my go-to savior is this incredible No-Bake Peanut Butter and Banana Cake. Seriously, if you need a showstopper dessert that’s ready in just 20 minutes of active time and chills itself into perfection, this is it.
We aren’t breaking out the mixer for any complicated creaming or scrubbing flour dust off the ceiling. This recipe is pure, unadulterated ease. It’s creamy, it’s got that perfect salty-sweet balance from the peanut butter, and the banana layers make it taste like a decadent, slightly healthier treat. Trust me, when I need something impressive for neighbors dropping by unannounced, I whip this up, and everyone thinks I spent hours slaving away. Spoiler alert: I spent most of that time waiting for it to chill!
The secret, I think, is using ingredients that are already doing most of the work for you. We rely on the fridge, not the flame, to set this beauty.
Why This No-Bake Peanut Butter and Banana Cake is a Must-Make
When I tell people this cake is my favorite, they usually look surprised because they think ‘cake’ means a big, hot mess in the oven. Not this one! It’s one of those recipes I keep taped inside my pantry door for emergencies. It’s so simple, but the flavor payoff is huge.
It’s perfect for summer parties or when you just need a sweet fix without powering up the stove. If you’re looking for easy, delicious things to whip up, I actually have a great collection of other quick snacks and appetizers you might love too!
Speed and Simplicity of the No-Bake Peanut Butter and Banana Cake
You only spend about 20 minutes working on this, tops! That’s just mixing the crust, whipping the filling, and layering everything up. No measuring flour or worrying about oven temperatures. If you can stir ingredients together, you are fully qualified to make this dessert. It’s stress-free baking, which is my favorite kind of baking!
Flavor Combination: Peanut Butter Meets Banana
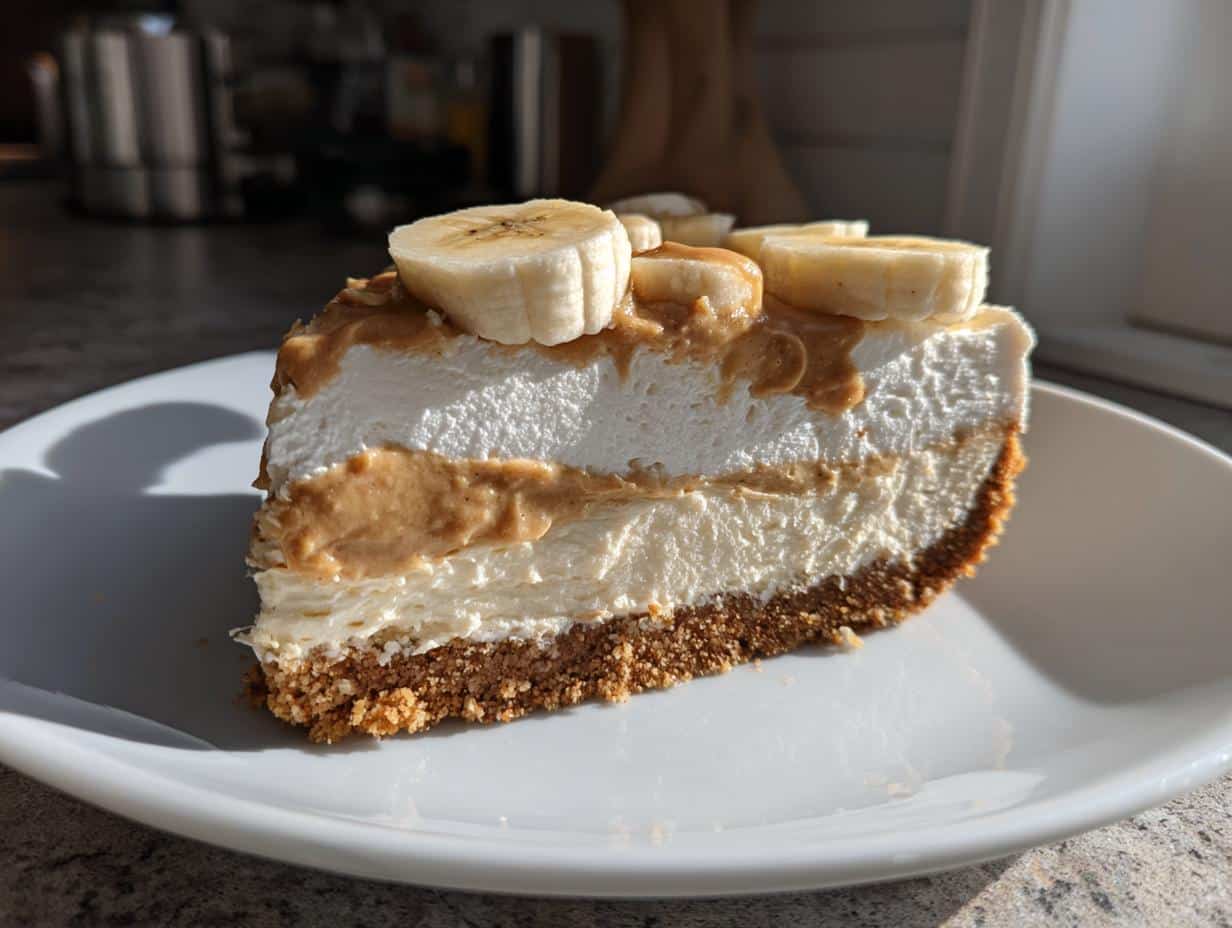
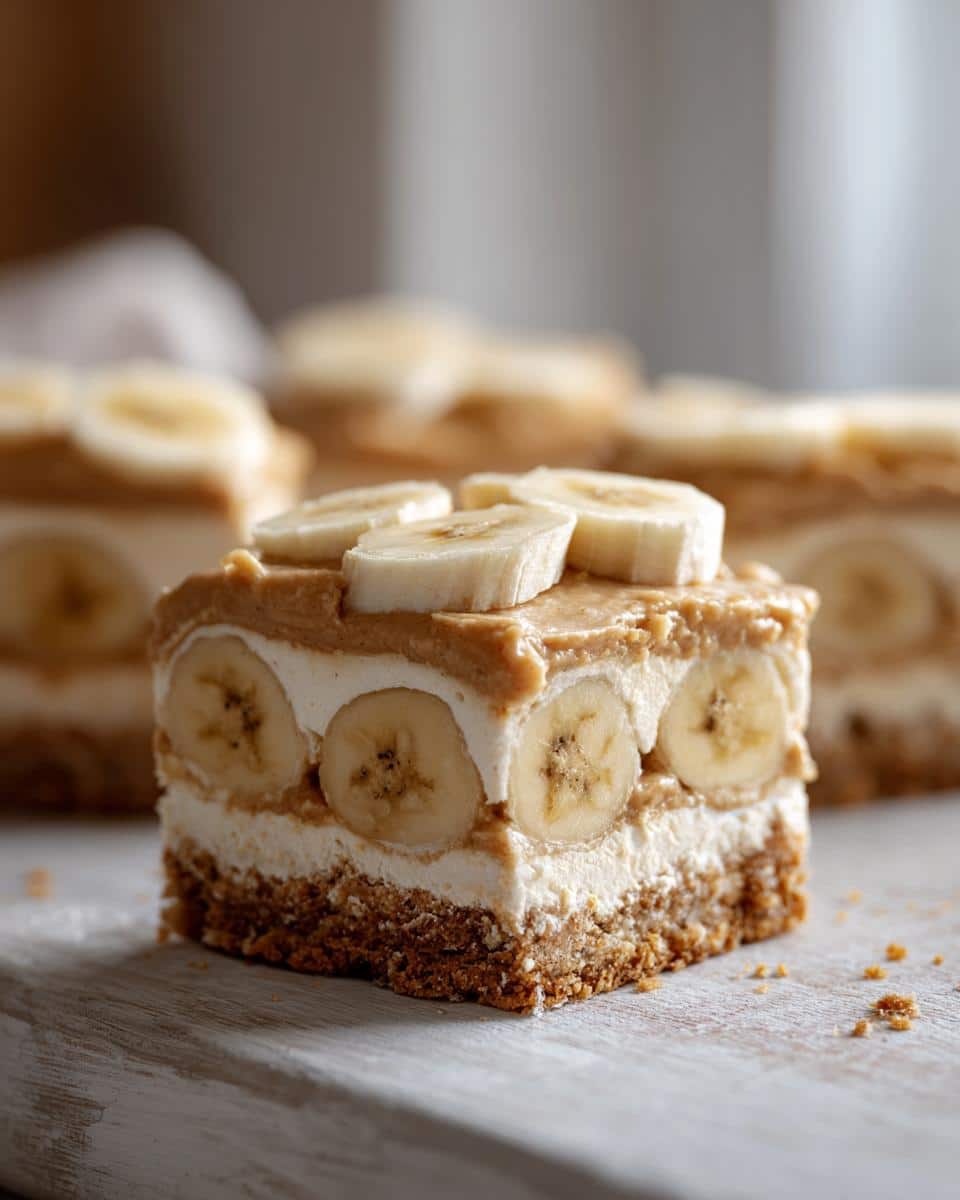
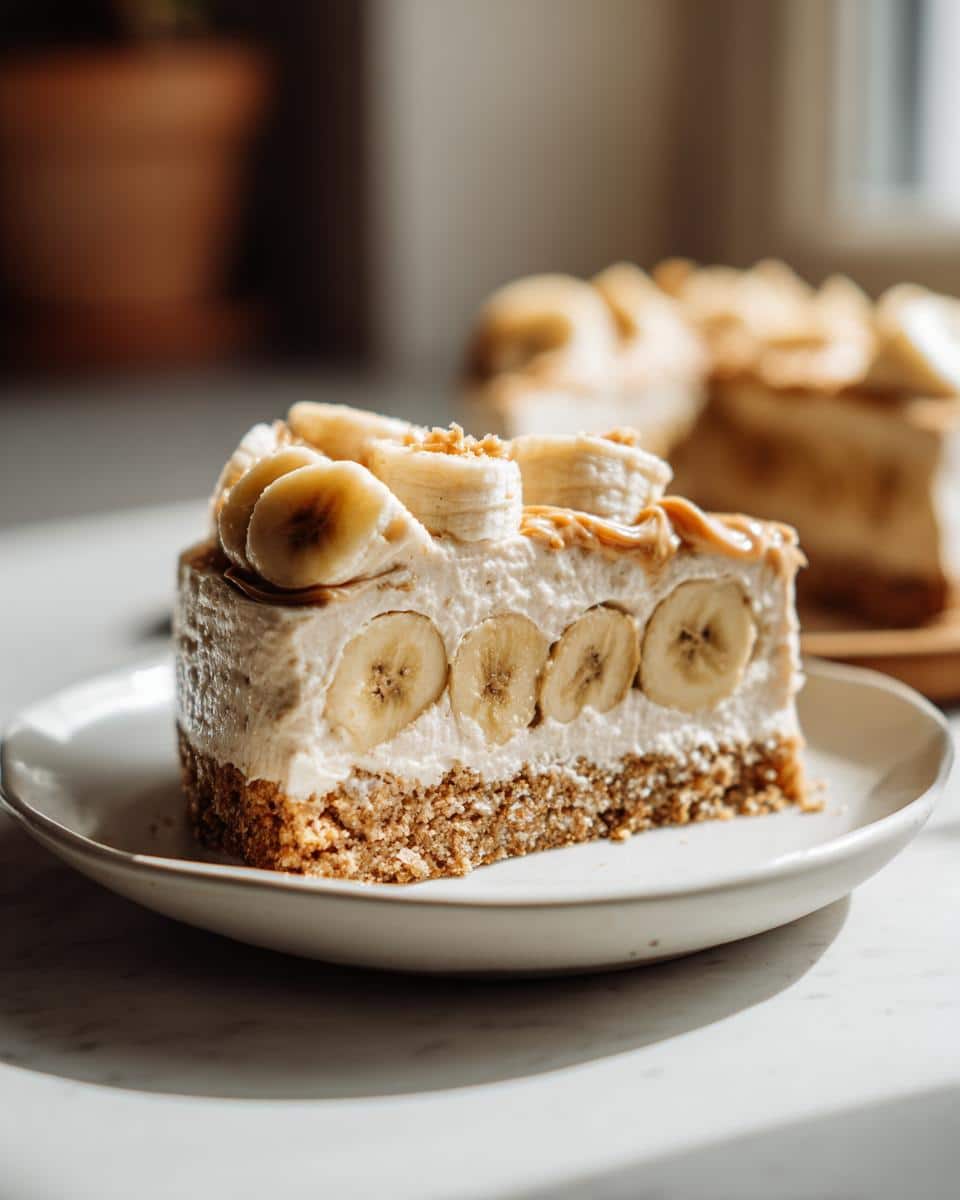
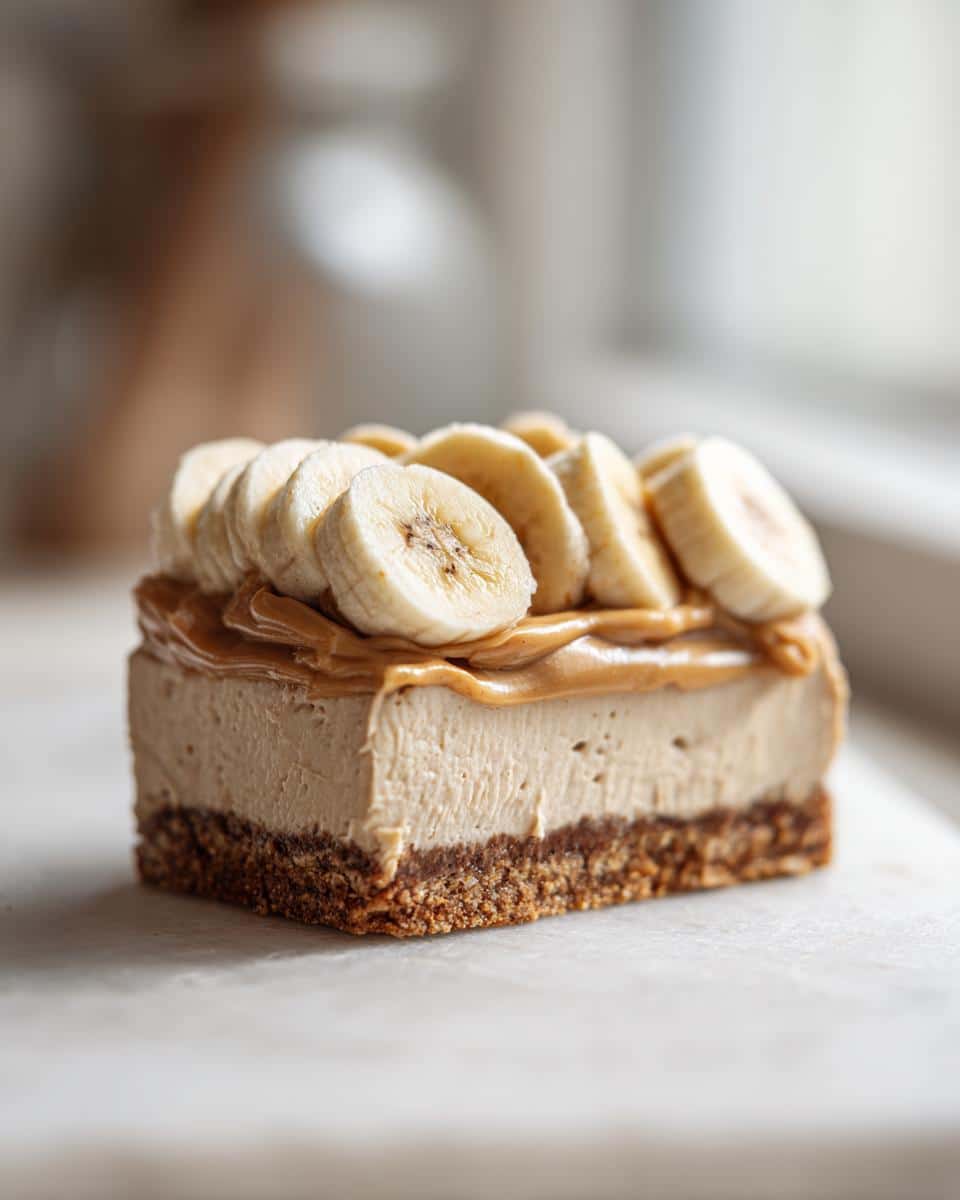
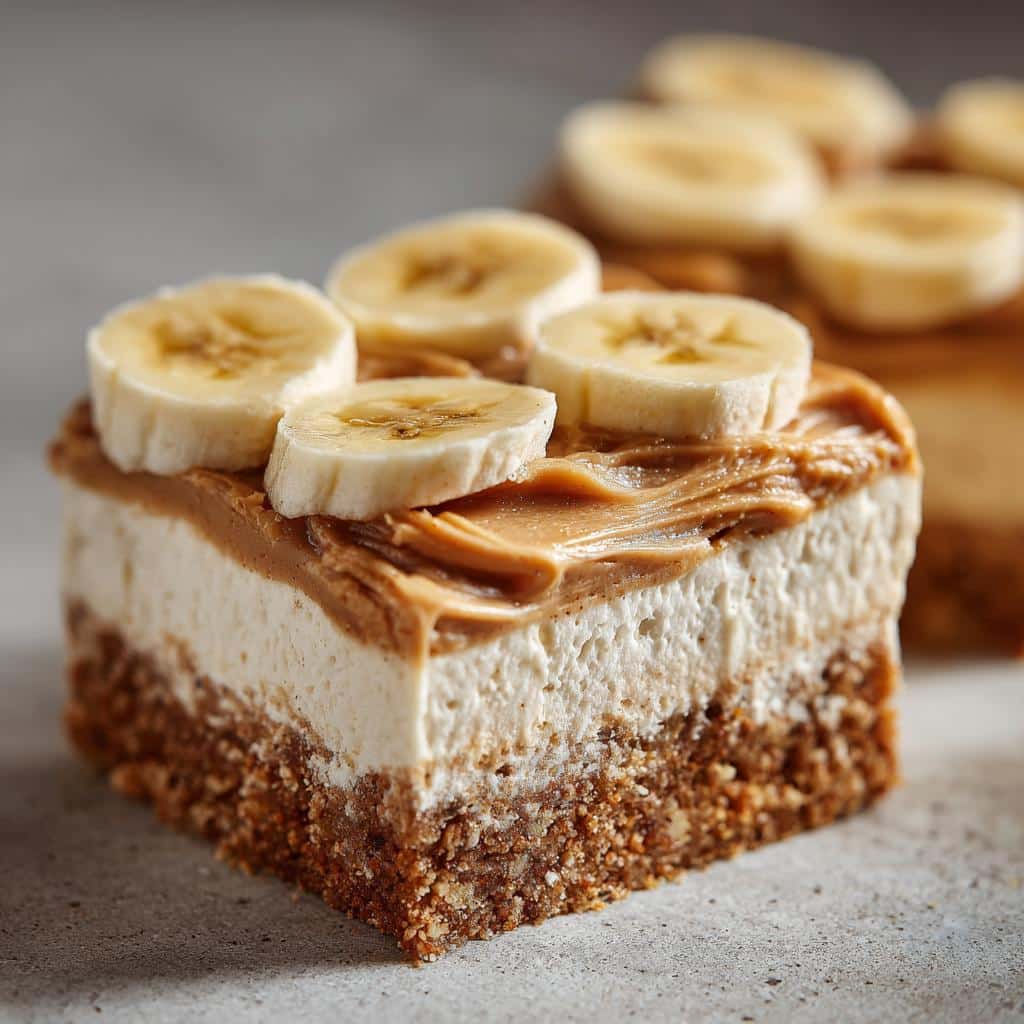
Honestly, peanut butter and banana are soulmates. The filling is so incredibly rich and creamy—think thick, luxurious peanut butter frosting—but the layer of fresh banana slices underneath keeps it from feeling too heavy. The banana gets soft and almost caramelized in the fridge against that salty peanut butter layer. It’s just divine; you get the perfect bite every single time.
Essential Equipment for Your No-Bake Peanut Butter and Banana Cake
Okay, so while we aren’t using the oven, we still need a few basics to get this cake looking as good as it tastes! Don’t panic, these things are probably already hiding in your kitchen cabinets. Having the right tools makes this whole process smooth as butter—or, well, smooth as softened cream cheese, in this case!
The absolute non-negotiable item here is your 9-inch springform pan. You really cannot get that clean, perfect edge we want without it. When you finally take the sides off and reveal that beautiful stack of crust, banana, and filling, you’ll thank me for insisting on the springform. It’s key for presentation because we aren’t dealing with flipping or inverting this delicate thing.
Other than that, you’ll just need a couple of trusty mixing bowls. You need one big one for bashing the peanut butter filling together, and honestly, a second, clean, fairly deep one for whipping up the heavy cream until it’s fluffy. I find using two separate bowls for the filling components makes folding easier later on and helps keep the air in the whipped cream.
- A sturdy 9-inch springform pan.
- A couple of mixing bowls (one large, one medium).
- A hand mixer or a stand mixer (though you can use a whisk if you’re feeling very ambitious!).
- A rubber spatula for folding and general scraping duties.
That’s truly it! No fancy pastry bags, no rolling pins needed for this beauty. Keep your tools ready, and we can move right onto the ingredients list!
Gathering Ingredients for the No-Bake Peanut Butter and Banana Cake
Getting ready for this no-bake wonder is half the fun, and honestly, it’s much easier than a standard grocery run because we aren’t hunting for baking powder or specialty flours! We’re focused on richness here—good peanut butter, full-fat dairy, and those perfect ripe bananas. I always make sure my cream cheese is actually soft before I even think about starting; if it’s cold, the filling gets lumpy, and we don’t want that drama.
I’ve broken down what you need into three simple groups. If you’re stopping by the store, grab these things, and you’ll be ready to mix in under 20 minutes. For more general kitchen inspiration, check out my latest posts on recipe essentials!
For the Graham Cracker Crust
The base has to be sturdy enough to hold up all that creamy goodness, and graham crackers are just the ticket. You need two cups of those crumbs—that’s generally about one full sleeve of crackers if you’re crushing them yourself. Don’t forget the half cup of melted butter to bind it all together. Press it tight so it doesn’t crumble when you slice later!
- 2 cups Graham cracker crumbs (about 1 sleeve of crackers)
- 1/2 cup Melted butter
For the Creamy Peanut Butter Filling
This is where the magic happens, so pay attention to the state of these ingredients! You need a full cup of creamy peanut butter, and make sure it’s at true room temperature so it mixes without fighting you. We also need eight ounces of cream cheese, which has to be good and softened. Then we sweeten it up with a cup of powdered sugar and a teaspoon of vanilla extract. The heavy lifter is one cup of cold heavy whipping cream—it *must* be cold so it whips up properly!
- 1 cup Creamy peanut butter (Room temperature)
- 8 ounces Cream cheese (Softened)
- 1 cup Powdered sugar
- 1 teaspoon Vanilla extract
- 1 cup Heavy whipping cream (Cold)
And, of course, you need two medium bananas, sliced thinly. They’re arranged right on top of that crust before the creamy filling goes on top. Layering is everything!
Optional Topping Ingredients
The cake is pretty amazing plain, but if you want that extra ‘wow’ factor, here’s the topping suggestion. You only need one main thing: a half cup of whipped topping. Just make sure it’s thawed out before you spread it gently over the chilled cake before serving. If you skip the topping, you can always drizzle some extra peanut butter over the top—no judgment here!
- 1/2 cup Whipped topping (Thawed)
Step-by-Step Instructions for the No-Bake Peanut Butter and Banana Cake
Alright, let’s roll up our sleeves—though really, all we’re doing is stirring things! This process is so quick we barely get our breath before we have to stick it in the fridge. If you’re really serious about a smooth filling, take this one piece of advice I learned the hard way: your cream cheese absolutely needs to be soft. If you try mixing cold cream cheese, you’ll end up with little white chunks floating around, and nobody wants that in their perfect cake!
Don’t forget, if you ever need a fast dessert that relies on mixing, check out my recipe for amazing brownie batter—it’s another lifesaver when time is short!
Creating and Setting the Crust
First up is the foundation. You just need to combine those two cups of graham cracker crumbs with your half cup of melted butter right in the bottom of your springform pan. Use the bottom of a measuring cup or just your fingers to press that mixture down firmly and evenly across the whole bottom surface. You want it compact! This keeps the crust from turning into dust the second you try to serve a slice later. Just press hard, establish those sides, and that’s the crust done. Easy peasy!
Preparing the Peanut Butter Filling Base
Now for the creamy part. Grab your big bowl for this. Beat that softened cream cheese and the room-temperature peanut butter together until they are perfectly smooth. I mean it—no lumps allowed! After that dream combo is mixed, gently stir in your powdered sugar and vanilla extract. Keep mixing until you see everything is just combined. We don’t want to overwork this yet because the next step needs air!
Folding in the Whipped Cream and Layering
This is where we introduce air, so pay attention! Take your *ice cold* heavy whipping cream and whip it separately until you get stiff peaks—you know, peaks that stand straight up when you lift the whisk. Now, take those stiff peaks and gently fold them into the peanut butter base, one third at a time. You have to be gentle here, folding with a spatula until no white streaks of cream remain. Be patient; this keeps the filling light! Once smooth, arrange your thinly sliced bananas neatly over your crust. Carefully spread the glorious peanut butter filling right over those bananas, smoothing the top as best you can.
Chilling and Finishing the No-Bake Peanut Butter and Banana Cake
This is the hardest part, I promise: waiting! You must cover the pan tightly—plastic wrap works great—and put the whole thing in your refrigerator. It needs a minimum of 4 long hours to set up properly. If you try scooping it out at 2 hours, it’ll just melt everywhere! Once it’s firm, you can gently spread on that thawed whipped topping, if you’re using it. Then, carefully run a thin knife around the edge and release the sides of the springform pan. Slice it up, and enjoy the silence as everyone digs in!
Tips for Perfecting Your No-Bake Peanut Butter and Banana Cake
Even though this is a ‘no-bake’ recipe, there are a few little tricks that separate a standard fridge cake from one that makes people ask for the recipe immediately. It’s all about temperature control for the main players: the peanut butter and the cream cheese. If those aren’t happy, your filling won’t be smooth.
If you’ve ever made this No-Bake Peanut Butter and Banana Cake and found the filling a little too soft, I guarantee it was because your cream cheese wasn’t quite soft enough. Seriously, let it sit on the counter! You should be able to push your finger into it easily without any resistance. Room temperature filling ingredients mix into a uniform, gorgeous cloud, but cold ones stay chunky.
Also, keep checking out other easy flavor ideas—I always find inspiration for easy, quick stuff over on this savory bites page, which gets me thinking! We stick to sweet here, but the principle of simple assembly holds true.
Keep That Heavy Cream Cold!
This tip is the opposite of the cream cheese rule, but it’s just as important! The heavy whipping cream needs to be straight out of the fridge, and using a cold bowl helps too. If your cream is warm at all, it won’t reach those stiff peaks we need to give the filling its structure. Warm cream just turns into sad, soupy liquid when you try to whip it, and we need that airiness to balance out the dense peanut butter and crust.
Perfecting the Banana Layer
Don’t use bananas that are rock hard, but please, absolutely do *not* use bananas that are bruised mushy either! The bananas are there to provide a soft, flavorful middle layer, not dissolve into the filling. I like to slice them about a quarter-inch thick. Thicker layers get too heavy and might make the cake slide apart when you cut it, but too thin, and you won’t even taste them over the peanut butter. Ripeness is key here—yellow with just a few little brown spots is perfect!
Slicing for the Win
Once that cake is chilled for at least four hours, it’s firm, but that peanut butter filling can still be sticky. If you try to slice it straightaway with a warm knife, you’re going to drag the filling right out of the slice. Here’s my trick: take your sharpest knife and dip the blade into a tall glass of very hot water. Wipe the blade dry quickly, and then make your cut. The heat melts the fats just enough to glide through cleanly, leaving you perfect squares every time. Reuse the hot water method for every single slice!
Storage and Make-Ahead Options for No-Bake Peanut Butter and Banana Cake
The best thing about this No-Bake Peanut Butter and Banana Cake? You can totally make it ahead of time! I mean, you *have* to make it ahead of time, since it needs that long chilly rest period, but that means you can plan your dessert days in advance. Having this ready to go is a lifesaver when company shows up unexpectedly.
The key to successful storage is keeping the air out. That filling is so rich, but if it sits uncovered, the top layer can get a little dry or absorb weird smells from the fridge—and nobody wants banana-flavored leftovers gone stale!
Refrigeration is Required
Once your cake has firmed up after that initial four-hour chill time, you need to cover it tightly. I usually use a sheet of plastic wrap laid gently right over the surface of the cake, especially if you skipped the optional whipped topping. If you used the topping, cover the whole pan loosely with foil or plastic wrap, making sure the plastic isn’t pressing down hard on the topping and squishing it. In the fridge, this cake stays wonderfully creamy and delicious for about three to four days. Seriously, the flavors actually deepen a little after the first day, which I totally love!
Can This Cake Be Frozen?
So, can you freeze this No-Bake Peanut Butter and Banana Cake? Yes, you absolutely can, but you have to be a little careful. Freezing works best if you chill it fully first, and then maybe skip the whipped topping entirely, as that can get a little spongy when it thaws.
If you plan to freeze it, wrap the *entire* chilled cake snugly in a couple of layers of plastic wrap, and then tuck that whole package into a large freezer bag or a foil-covered container. It freezes pretty well for up to a month. When you want to eat it, you need to move it from the freezer to the refrigerator the night before you plan to serve it. Don’t try to rush the thaw on the counter; you want that slow, gentle melt to keep the texture nice. It usually takes about 8 to 10 hours to thaw completely in the fridge, but the reward is a chilled, ready-to-eat dessert later!
Handling the Crust After Chilling
The graham cracker crust is super sturdy when cold, but if it’s sitting for several days, the moisture from the filling starts to seep into it, which is normal, but it can make the very bottom get a little soft. If you want to preserve that crispness, try laying a small round piece of parchment paper on the bottom of the pan before you even press the crust in. Then, when storing, you can handle the cake with less worry about the bottom crumbling when you slice into it!
Serving Suggestions for Your Delicious No-Bake Peanut Butter and Banana Cake
When slicing up this stunning No-Bake Peanut Butter and Banana Cake, you might wonder if it even needs a companion. Honestly, it stands up perfectly well on its own—it’s rich, it’s sweet, and it has so much going on between the creamy filling and the fruit. But, if you’re serving it up for a big gathering, sometimes a little garnish or an extra drizzle can really take it over the top! You don’t want to compete with that gorgeous peanut butter flavor, so we keep the additions simple and complementary.
I don’t bother with big side dishes for this cake, but presentation matters! A little something extra makes it feel like a true centerpiece dessert.
A Light Dusting of Chocolate or Cocoa
If you decided to skip the optional whipped topping, I highly recommend using a tiny, fine-mesh sieve and dusting the top surface with unsweetened cocoa powder right before serving. The bitterness of the cocoa cuts through the sweetness of the peanut butter so perfectly. It’s dramatic, it looks professionally finished, and it adds zero hassle. Just a light veil, not a heavy blanket—we want to compliment the banana layer, not hide it!
The Perfect Peanut Butter Drizzle
If you want to double down on the main star, you can make a super simple peanut butter drizzle. You don’t need much! Just take about two tablespoons of creamy peanut butter and stir in maybe a teaspoon or two of very hot water or milk until it becomes runny enough to drizzle off a spoon. Put this mixture into a small zip-top bag, snip one tiny corner off, and zigzag it artfully over the top of the cake slices. It melts slightly into the cold filling when it hits the plate, and it looks amazing against the pale filling.
A Touch of Salt or Crunch
Remember how I mentioned sprinkling chopped peanuts on top as an alternative to the whipped topping? That’s a fantastic textural contrast! Salty roasted peanuts sprinkled over the top just before serving give you that satisfying crunch against the ultra-smooth filling. If you’re serving slices individually, you can also dust the plate beneath the slice with a tiny pinch of flaky sea salt. That hit of salt elevates the peanut butter flavor like crazy—it’s my grown-up move!
Simple Caramel Pairing
If you absolutely must serve this with a sauce, keep it restrained and rich, like a good caramel. A warm, thick caramel sauce pairs unbelievably well with banana, and it obviously works with peanut butter. I only suggest using just a small pool of caramel on the plate, not drowning the entire slice. You want the cake to shine, but a little bit of that golden sauce around the edges makes for a really elegant presentation when you serve those perfect, clean slices.
Frequently Asked Questions About No-Bake Peanut Butter and Banana Cake
When you make a dessert this easy, sometimes people get nervous they missed a secret trick! I always get a ton of questions after people try this No-Bake Peanut Butter and Banana Cake for the first time, usually concerning texture or possible ingredient swaps. I’ve gathered up the most common ones right here, so you can avoid any little hiccups!
For more ideas on simple treats, especially if you’re looking into other no-oven options, you should absolutely see what I have going on with my oat-based recipes, like these great oat dog cookies—though hopefully, you’re eating this cake yourself!
Can I use crunchy peanut butter in this No-Bake Peanut Butter and Banana Cake?
Oh, that’s a classic substitution question! You totally *can* use crunchy peanut butter if you prefer that texture, but you need to know what you’re signing up for. If you swap the creamy peanut butter for crunchy in the filling, your filling will have little pieces of peanut throughout, which changes the signature velvety smoothness we are aiming for. It’s tasty, of course, because peanut butter is peanut butter, but it won’t be quite the same melt-in-your-mouth experience. I stick to creamy for the smoothest blend with the cream cheese!
How long does the No-Bake Peanut Butter and Banana Cake last in the fridge?
Because this cake is packed with dairy (cream cheese and heavy cream) and fresh fruit (bananas), we need to be smart about storage. It really shines in the first 24 hours, but if you cover it tightly as I mentioned earlier, it holds up beautifully for about three full days in the refrigerator. After day three, the bananas might start turning a little brown or mushy against the filling, so aim to enjoy it all within 72 hours for the absolute best texture.
What is the best way to slice the No-Bake Peanut Butter and Banana Cake cleanly?
I covered this a little bit in the tips section, but it’s worth repeating because it’s the key to getting those magazine-worthy slices! Never try slicing this cold cake with a room-temperature knife, or you’ll just smear the filling everywhere. The secret is the hot knife method. Fill a tall glass with very hot water. Dip your sharpest long knife completely into the hot water for about 10 seconds, wipe the blade bone-dry right before you cut, and then make your slice. Rinse, reheat the water, wipe, and cut the next slice! It keeps that perfect layer separation looking crisp!
Why is my filling runny?
This is the most common panic call I get! If your filling is runny after chilling, it almost always comes down to one of two things, or usually both: either your cream cheese wasn’t truly softened (so it didn’t mix smoothly with the peanut butter), or you didn’t whip the heavy cream to stiff peaks—or worse, you over-folded the whipped cream into the base, knocking all the air out. If you look at the ingredients, there’s no gelatin or starch acting as a stabilizer, so we rely entirely on that perfectly whipped cream structure to hold everything up. Next time, check that cream cheese texture first!
Nutritional Estimate for This No-Bake Dessert
Now, let’s talk numbers. Because this No-Bake Peanut Butter and Banana Cake includes a graham cracker crust, full-fat cream cheese, and peanut butter, it is definitely a rich treat! It’s not an everyday snack, but it’s certainly worth every creamy bite when you need dessert.
Keep in mind these are just rough estimates based on standard supermarket ingredients for 8 generous servings, and your final numbers will change depending on the brand of peanut butter or the amount of butter you use in that crust!
- Calories: Roughly 450–500 kcal per serving
- Fat: Around 30–35g per serving
- Protein: About 8–10g per serving
- Carbohydrates: Approximately 40–45g per serving
Enjoy it responsibly, and remember that the best part of dessert is the joy it brings, not the grams of fat!
No-Bake Peanut Butter and Banana Cake
Ingredients
Equipment
Method
- Prepare the crust. Combine the graham cracker crumbs and melted butter in a bowl. Press the mixture firmly into the bottom of a 9-inch springform pan.
- In a large bowl, beat the peanut butter and softened cream cheese together until smooth. Add the powdered sugar and vanilla extract, mixing until just combined.
- In a separate, clean bowl, whip the cold heavy whipping cream until stiff peaks form.
- Gently fold the whipped cream into the peanut butter mixture until no streaks remain. Do not overmix.
- Arrange the thin banana slices over the crust in a single layer.
- Spread the peanut butter filling evenly over the bananas.
- Cover the pan and refrigerate for at least 4 hours, or until the cake is firm.
- Before serving, top the cake with whipped topping, if desired. Release the springform side and slice.


