If you’ve ever been overwhelmed by trying to make store-bought quality jerky at home, especially with leaner meats like venison, I totally get it. Slicing lean ground meat uniformly? Nearly impossible without the right trick! That’s why I finally perfected this Frozen Venison, Lentil & Parsley Jerky recipe. Wow, is it a game-changer.
I started tinkering because I had a ton of ground deer meat from last season and frankly, I wanted to sneak some extra fiber into the snacks around here. Mixing in cooked lentils and fresh parsley gives this jerky an amazing, hearty texture you just don’t get with plain dried meat. Trust me, you have to freeze the base before slicing—it’s the only way to get those perfect strips that dry evenly. It’s satisfying, nutritious, and honestly, it smells incredible while it’s dehydrating!
Why This Frozen Venison, Lentil & Parsley Jerky Recipe Works
When you’re dealing with ground meat and other soft ingredients like lentils, getting uniform strips for drying feels impossible—until you use my trick. This recipe builds trust because every step is designed for perfect results, even if you aren’t a jerky expert.
- It’s less messy! Freezing solidifies everything before slicing.
- We get great texture and added nutritional value from the lentils.
- The parsley adds a fresh flavor that cuts through the richness of the venison.
It really just makes superior homemade snack!
Unique Texture from Freezing the Frozen Venison, Lentil & Parsley Jerky Base
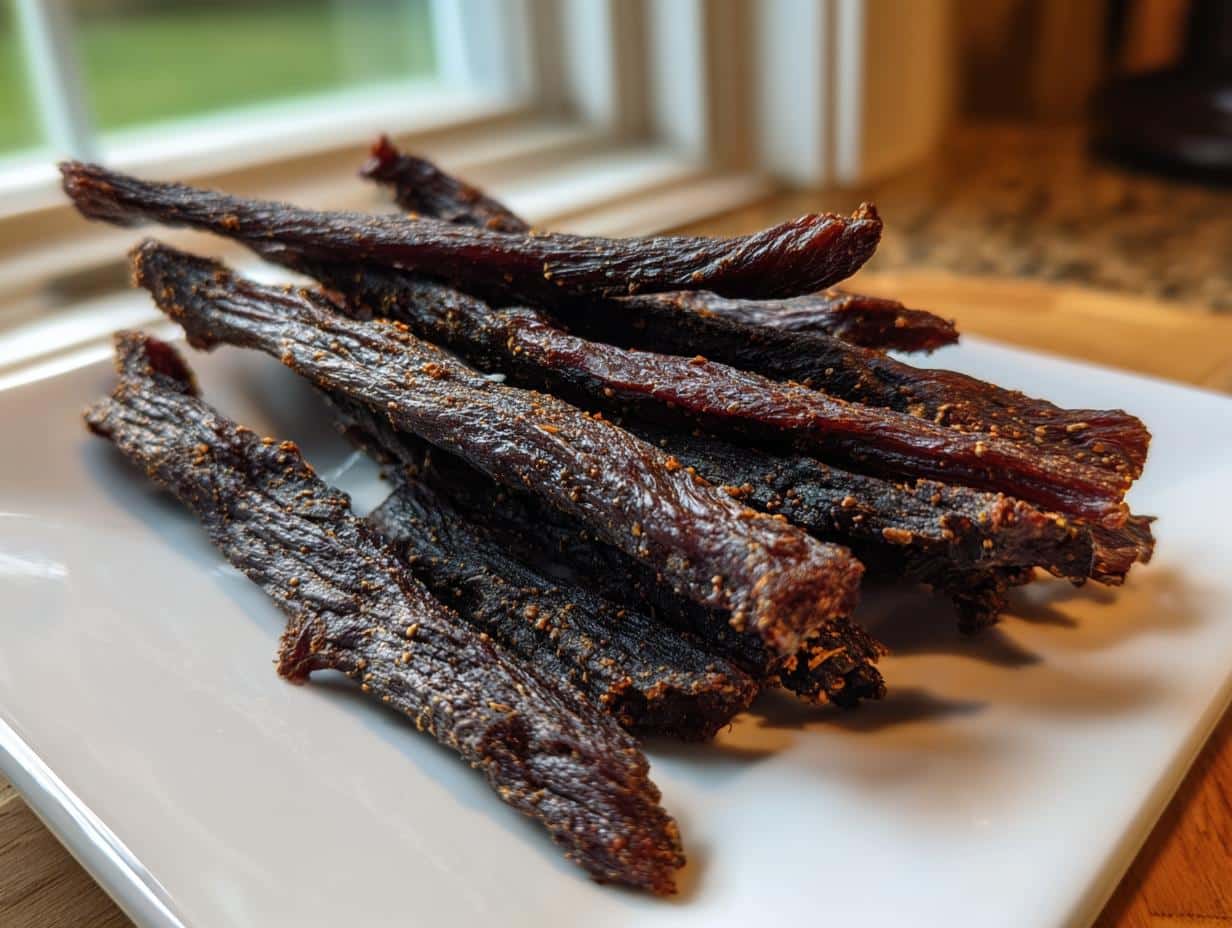
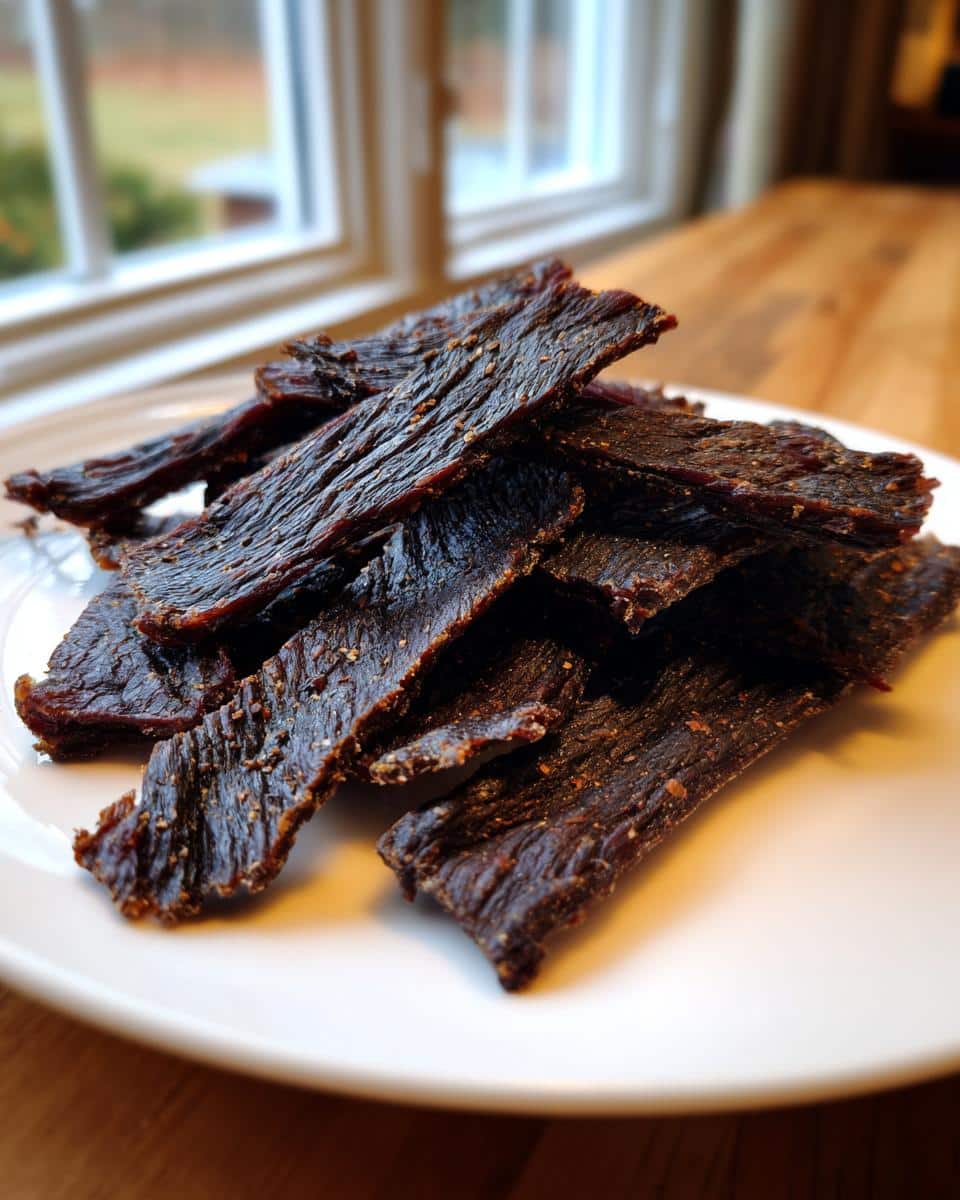
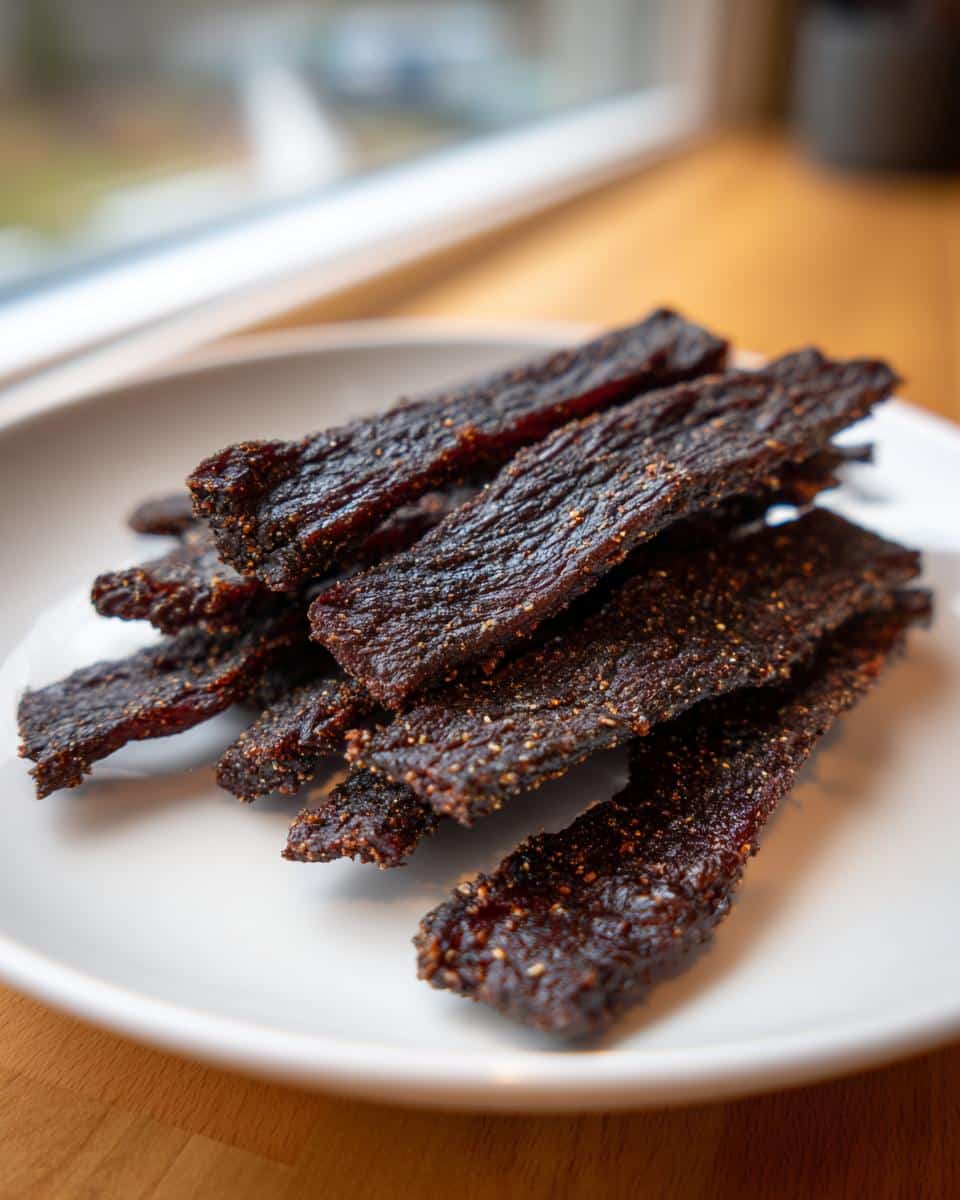
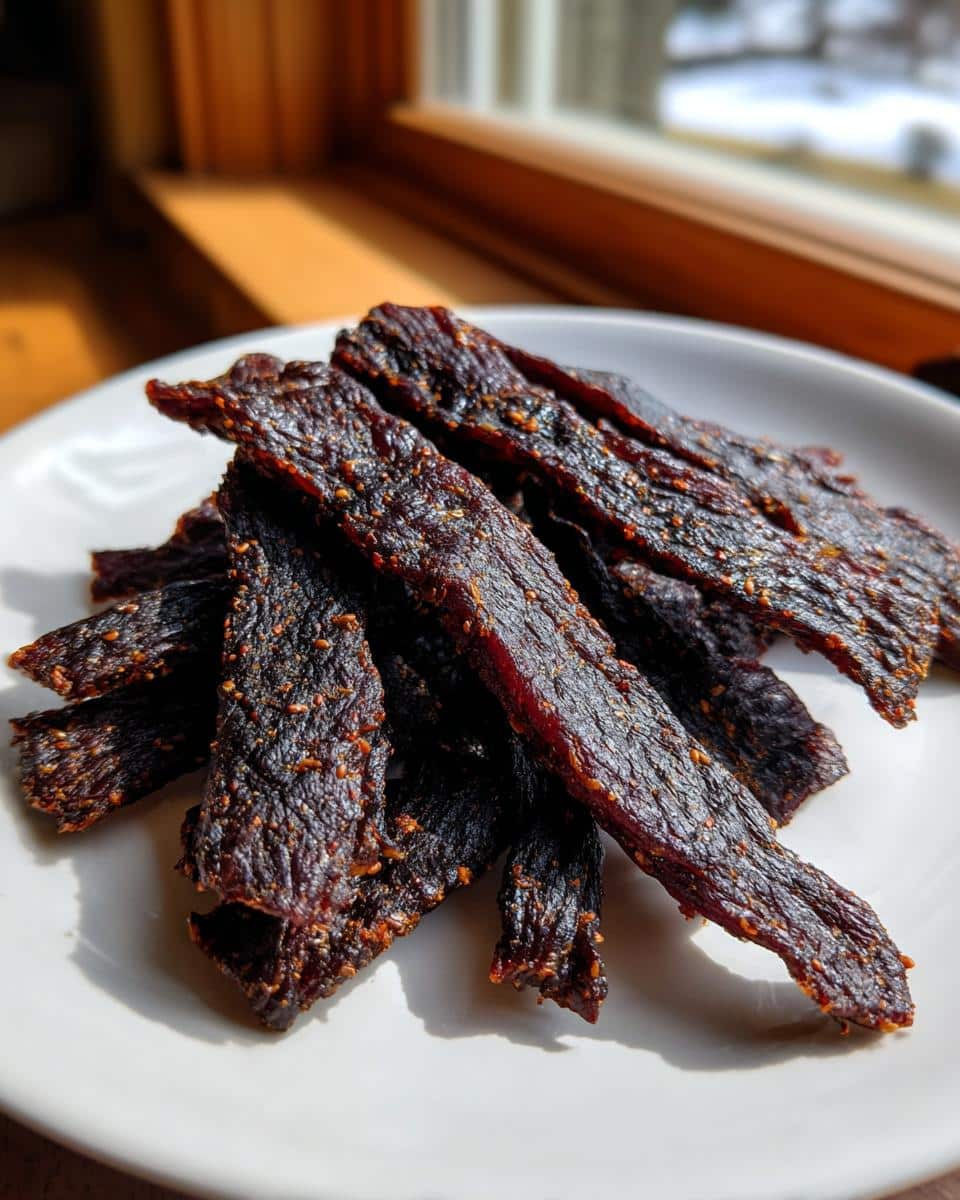
Here’s the big secret: you can’t slice this mixture when it’s room temperature, or you’d just get meat mush. Freezing it solid for a couple of hours basically turns the whole thing into a dense block. That firmness allows you to cut really clean, even strips—about 1/8th of an inch thick—which is essential for drying evenly.
Adding Fiber and Bulk with Lentils
That ground venison is great, but this Frozen Venison, Lentil & Parsley Jerky is better because of what we mix in. The cooked brown lentils don’t add any weird flavor, but they really bulk up the snack. They stretch the meat a bit, sure, but more importantly, they boost the fiber content substantially, making this jerky way more satisfying!
Essential Ingredients for Frozen Venison, Lentil & Parsley Jerky
Getting the ingredients right here is non-negotiable, especially since we’re trying to get that perfect, sliceable block later on. You don’t want to skimp on the spices, or it’ll taste flat, but we also need the structure providers like the lentils and the right fat content in the meat. I always make sure I have everything out before I even think about turning on the food processor. If you’re looking for other quick bites, you might check out my list of 12 easy appetizers and snack ideas!
Jerky Mixture Ingredients
This is the heart of the whole operation. When you mix these up, remember you’re processing them into a paste, so freshness really matters here, especially with that parsley!
- Ground venison: You’ll need 1 pound of this. I always grab the 80% lean or leaner option—too much fat just won’t dry right in the dehydrator.
- Cooked brown lentils: We need 1 cup, but listen closely: they must be drained really, really well. Excess water is the enemy of good jerky.
- Fresh parsley: About 1/2 cup, chopped. This gives it that lovely green fleck and fresh taste.
- Smoked paprika: 1 teaspoon. This is key for that smoky depth!
- Garlic powder: Half a teaspoon. A must-have seasoning in my book.
- Onion powder: Half a teaspoon as well. It rounds out the flavor nicely.
- Salt: Half a teaspoon. Go easy at first; you can always add more to taste later.
- Black pepper: Just a quarter teaspoon to finish off that savory punch.
Equipment Needed for Your Frozen Venison, Lentil & Parsley Jerky
You don’t need a million fancy tools for this, which is what I love about homemade jerky. But there are three pieces of equipment that make the process seamless, trust me. If you skip one of these, say the freezer-safe container, you’ll end up with jerky paste stuck all over your counter!
Preparation is half the battle when you’re dealing with something that needs to freeze and then dry for hours. Having these things ready means you can mix, freeze, and move straight to the dehydrator without scrambling later.
- Food processor: This is vital for getting the venison, lentils, and herbs into that coarse paste consistency we talked about. Trying to do this by hand would take forever and give you sore arms!
- Freezer-safe container: You need something sturdy—a glass dish or a heavy plastic tub works great. The goal is keeping the mixture flat and dense while it freezes solid, so make sure it’s big enough to hold everything firmly pressed down.
- Dehydrator: This is the real workhorse! While you can technically bake jerky in the oven if you’re careful, a dehydrator gives you the low, consistent heat needed for 6 to 8 hours of drying that results in that perfect pliable chew.
Step-by-Step Instructions for Making Frozen Venison, Lentil & Parsley Jerky
Alright, let’s get down to business! This isn’t hard, but you have to follow the freezing step precisely, or you end up with a giant mess. I always set a timer for the freezer stage because I tend to get distracted by other kitchen tasks. When done right, though, the payoff is huge—you get hearty, flavorful jerky that holds together beautifully. If you’re looking for more meaty snack ideas, you might want to peek at my meaty dog treats section later!
Mixing and Forming the Frozen Venison, Lentil & Parsley Jerky Base
First things first: we combine everything in the food processor. Dump that ground venison, the well-drained lentils, the chopped parsley, and all those lovely spices—paprika, garlic, onion powder, salt, and pepper. Now, this is important: you only want to pulse it. We are aiming for a coarse paste that holds together, not a smooth, silky puree like hummus. If you over-process this, the texture suffers big time later on.
Once it looks correctly textured, scrape it all out into your freezer-safe container. I press down on that mixture really firmly with the back of a spatula. You have to squish out every last air pocket you can—air equals freezer burn and uneven drying, which we absolutely don’t want for perfect Frozen Venison, Lentil & Parsley Jerky.
Freezing and Slicing Technique
Into the freezer it goes! You need it to be solid, so plan on at least two hours minimum. When you pull it out, it should be firm enough that you can handle it without squishing it into mush. Lay a sheet of parchment paper down, plop the frozen meat block on top, then lay another sheet of parchment on the very top.
Now you slice! Use your sharpest knife or, if you’re fancy, your meat slicer. We want strips around 1/8 to 1/4 inch thick. Thicker than that, and they take forever to dry; thinner, and they turn into crackers. Taking your time here ensures every piece finishes drying at the same clip.
Drying the Jerky Strips
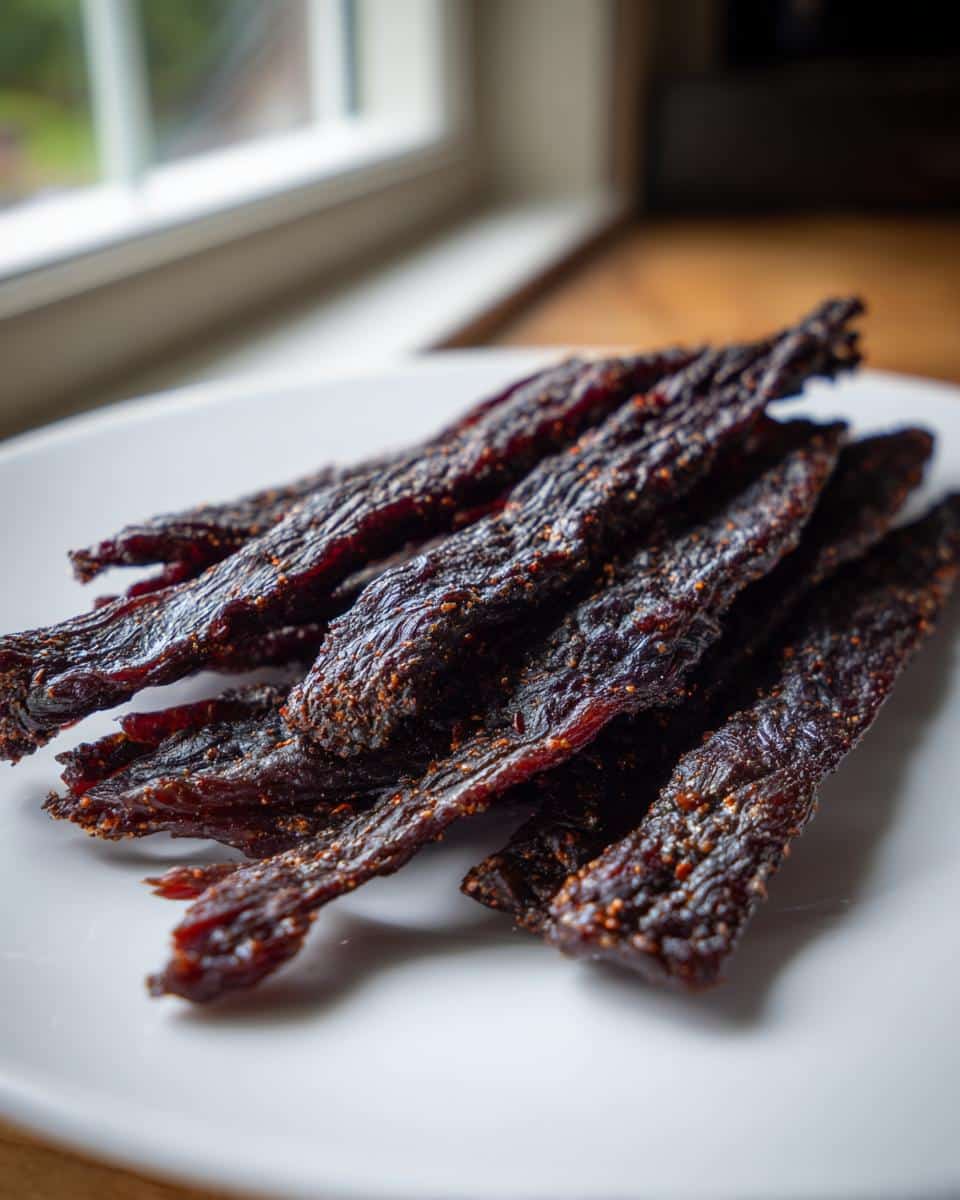
Once they’re sliced, gently peel off the top parchment and arrange those strips onto your dehydrator trays. Make sure none of the pieces are touching or overlapping—they need their own space to breathe and dry properly. Set your dehydrator temperature to 160 degrees Fahrenheit (that’s 71 degrees Celsius, just so you remember).
The drying time is an estimate, usually 6 to 8 hours. You need to check them periodically, starting around hour six. The jerky is done when it’s dry enough that if you slightly bend a piece, it cracks a tiny bit but still feels a little flexible. If it snaps clean in half, you’ve gone too far! Let them cool completely on the tray before you pack them away, or you’ll trap moisture inside.
Ingredient Notes and Substitution Advice for Frozen Venison, Lentil & Parsley Jerky
Okay, let’s talk about getting those components just right. Since we’re making something hearty here, sometimes we need to swap ingredients based on what we have on hand or what’s readily available. If you’re using this treat for your furry friends—and hey, I certainly do, check out my dog biscuit recipes if you haven’t—being careful about the meat leaness is super important.
For the foundation, we absolutely must use lean meat. That’s why I specified 80% lean venison or leaner. If your ground meat has too much fat, it won’t dry out properly in the dehydrator; you’ll end up with greasy soft spots even after 10 hours, and that’s just not safe or good for storage. If you happen to only have regular ground beef on hand, just make sure it’s at least 90/10, otherwise, ditch the fat before you process everything.
The lentils are another area where you can be flexible, but remember the goal! You must cook them first, obviously, and they should be fully drained. If you don’t have brown lentils, green ones work just as well structurally. Just please, no canned lentils that swim in salty brine; we’re controlling all the sodium here!
As for the parsley, it’s there mostly for color and a little freshness. If you happen to be totally out of fresh parsley, you can substitute dried parsley, but you’ll need to cut the amount way down—like maybe a tablespoon or two. Dried herbs are way more potent, but honestly, fresh gives a brighter flavor profile that I prefer for this specific Frozen Venison, Lentil & Parsley Jerky batch.
Tips for Perfect Frozen Venison, Lentil & Parsley Jerky
Making a big batch of jerky means you want every piece to come out tasting incredible and drying perfectly, right? I’ve learned a few little things over the years that stop the process from going wonky, especially since we’re working with ground meat here instead of whole muscle cuts. These tips are what separate the good batches from the absolute best batches of Frozen Venison, Lentil & Parsley Jerky.
My biggest success tip centers entirely on that freezing and slicing stage. Seriously, don’t rush it. If you think it’s frozen enough, leave it in for another 30 minutes. A slightly too-soft block means uneven slices, and uneven slices mean some pieces will be bone-dry while others are still soft and under-done when you check them hours later.
The Slicing Tool Matters for Uniformity
If you have a meat slicer, use it! I know, it sounds extravagant for a simple jerky recipe, but if you plan on making this often, it’s worth it. A good slicer lets you set that thickness—say, exactly 1/8 inch—and every single strip will be identical. That uniformity is the secret sauce for achieving perfect, consistent drying times. You won’t be rotating trays or juggling pieces that finish early.
If you’re strictly using a knife, which I often do when I haven’t set up my slicer, use the sharpest, thinnest blade you own. And here’s a trick: keep dipping the knife in hot water and wiping it dry between every few cuts. The slight warmth helps prevent the frozen mixture from sticking too much to the blade itself, giving you cleaner edges.
Don’t Skip Cooling Completely Post-Dehydration
It’s so tempting to package up that warm jerky straight from the dehydrator tray, but please, stop yourself! When hot jerky goes into an airtight container, that residual heat creates steam inside. And what does steam do? It reintroduces moisture back into your beautifully dried meat. That ruins the shelf life and can lead to spoilage faster than we want.
After you pull the trays out of the dehydrator, lay the strips out on a clean wire cooling rack, spaced apart, for at least an hour—maybe two if it’s a humid day. Let them get completely down to room temperature before you seal them up in that airtight jar. This step guarantees that satisfying, long-lasting chew. If you want more straightforward tips for food preparation, you can always check out my main kitchen blog for hacks!
Storage and Shelf Life for Your Homemade Frozen Venison, Lentil & Parsley Jerky
We put in all that work—mixing, freezing, slicing, and drying for hours upon hours—so we definitely want to make sure this Frozen Venison, Lentil & Parsley Jerky lasts! Storing it correctly is just as important as getting the drying temperature just right. The biggest threat to your jerky? Moisture, moisture, moisture.
Remember what I stressed earlier about cooling? That’s step number one for proper storage. You absolutely cannot seal up the jerky while it’s still even slightly warm. That warmth creates condensation inside the container, and condensation means mold. Ugh, no thanks!
Once those strips are completely cool to the touch, you have two main options for keeping your jerky fresh. I usually go by how fast I think we’re going to eat it!
Room Temperature Storage
If you know you and the family (or your furry pals!) are going to gobble this batch up within a couple of weeks—say, two weeks max—you can keep it right on the counter. Just make sure they are in a good, airtight container. Glass jars with tight lids work wonderfully here. Keep the container somewhere cool and dark, away from the oven or sunlight.
Because this particular Frozen Venison, Lentil & Parsley Jerky has those lentils and parsley mixed in—which adds a bit more density than plain muscle meat jerky—I’d err on the side of caution and aim for less than two weeks at room temp. The lentils hold a little more structure than pure meat, but they’re still prone to softening if they sit out too long.
Refrigeration for Longer Keeping
If you made a huge batch, or if it’s super humid in your kitchen, always go for the fridge. Refrigeration pushes the shelf life out significantly, giving you peace of mind. Pop the completely cooled jerky strips into a high-quality freezer bag—squeezing out as much air as possible—or a sealed container and pop it into the main compartment of your refrigerator.
In the fridge, this jerky will keep beautifully for much longer, easily a month or maybe even close to two, though I’ve never had one last that long around here! When you pull it out of the cold, if the texture seems a little stiff at first, just let it sit on the counter for about 30 minutes before serving. Enjoy those snacks!
Frequently Asked Questions About This Venison Jerky
I always get a few questions when I post this recipe because the *Frozen Venison, Lentil & Parsley Jerky* process is a little different than just drying solid strips of muscle. People usually wonder about swapping meats or what to do if they don’t have a dehydrator handy. Here are the top things readers ask me all the time!
Can I use beef instead of venison in this jerky recipe?
Yes, absolutely you can! Venison is fantastic because it’s usually so lean, which is perfect for jerky. But if you don’t have access to great game meat, use a lean cut of ground beef instead. Remember the rule we talked about: you need 80% lean or leaner. If you use anything fattier, the fat won’t dry out properly in the dehydrator and it will go bad fast. So, stick to 90/10 beef if you can swing it!
How do I know when the jerky is fully dry?
This is probably the most important question! When you bend a finished strip, it should crack slightly but still look pliable—it shouldn’t snap like glass, but it shouldn’t feel soft or doughy in the middle either. If you’re testing a strip that feels a little soft, just pop it back into the dehydrator for another hour or so. Getting the texture right ensures great flavor and shelf stability. If you’re making these as snacks for your pup, you always want them on the firmer side! I have some great puppy treat recipes that are slightly softer if you prefer that.
Can I bake this instead of dehydrating?
You can, but you have to be super careful because the temperature is much higher in an oven. If you bake this Frozen Venison, Lentil & Parsley Jerky mixture, set your oven to the absolute lowest temperature it will go—ideally around 170°F to 180°F (77°C to 82°C). You also need to prop the oven door open a crack, just enough to let the moisture escape! If you don’t vent the moisture, you’ll steam the jerky instead of drying it, and that’s no good.
Do the lentils really help with slicing when frozen?
They sure do! The lentils, once they are cooked and mixed in with the ground venison, essentially act as a binder and a solid filler. When you freeze that block, the lentils help the whole mass freeze evenly and firmly, giving you a structure that’s easier to slice uniformly compared to just ground meat alone. It’s a huge help for getting those perfect 1/8-inch strips!
Estimated Nutritional Data for Frozen Venison, Lentil & Parsley Jerky
Since we are packing a lot of whole ingredients—meat, legumes, and fresh herbs—into these little snack strips, people are always curious about what they are actually putting into their bodies! I always feel better knowing exactly what I’m getting, even with homemade treats like this Frozen Venison, Lentil & Parsley Jerky.
Keep in mind that this nutrition breakdown is based on dividing the entire batch into 12 equal servings, and it’s an estimate based on standard ingredient values. Actual values can shift depending on the exact leanness of your venison and how much liquid came out of those lentils!
- Calories: 105 per serving. That’s a great bang for your buck in terms of a dense, savory snack!
- Protein: 11 grams. Thanks to that venison and the lentils, this is packed with protein to keep you satisfied.
- Carbohydrates: 6 grams. Most of this comes right from those wonderfully nutritious lentils.
- Fat: 4 grams. This is low because we made sure to use very lean venison!
- Saturated Fat: 1 gram. Keeping this number low was a priority for me.
- Fiber: 2 grams. Hello, digestive help from the legume power!
- Sugar: Just 1 gram. No added junk sugar in our jerky, thank goodness.
- Sodium: 150 milligrams. I kept the salt quite low, which is why you might want to taste test before adding extra at the beginning.
- Cholesterol: 35 milligrams.
So, there you have it! A fantastic high-protein, reasonably low-fat, and surprisingly high-fiber snack. As always, these numbers are guides, not gospel, since we are cooking with whole, fresh food, but they give you a great baseline for what you’re enjoying!

Frozen Venison, Lentil & Parsley Jerky
Ingredients
Equipment
Method
- Combine the ground venison, cooked lentils, parsley, smoked paprika, garlic powder, onion powder, salt, and black pepper in a food processor.
- Pulse the mixture until it is well combined and forms a coarse paste. Do not over-process into a smooth puree.
- Transfer the mixture to a freezer-safe container. Press it down firmly to remove air pockets.
- Freeze the mixture for at least 2 hours, or until firm enough to slice thinly.
- Remove the mixture from the freezer. Place it between two sheets of parchment paper. Use a sharp knife or a meat slicer to cut the mixture into strips about 1/8 to 1/4 inch thick.
- Arrange the strips on your dehydrator trays, ensuring they do not overlap.
- Set your dehydrator to 160 degrees Fahrenheit (71 degrees Celsius). Dry the jerky for 6 to 8 hours, or until it is dry but still slightly pliable when bent. Check for doneness periodically.
- Turn off the dehydrator and let the jerky cool completely before storing.


