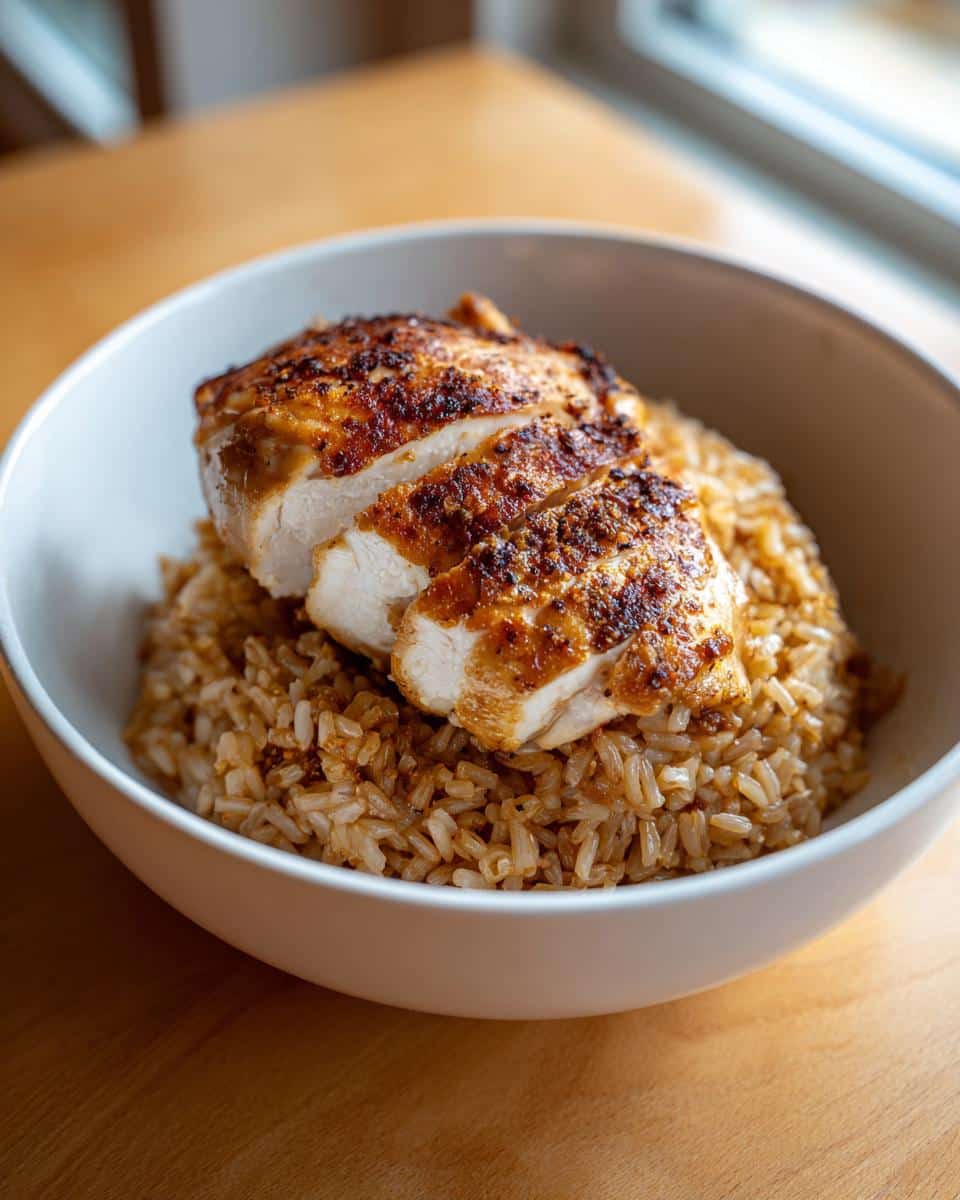
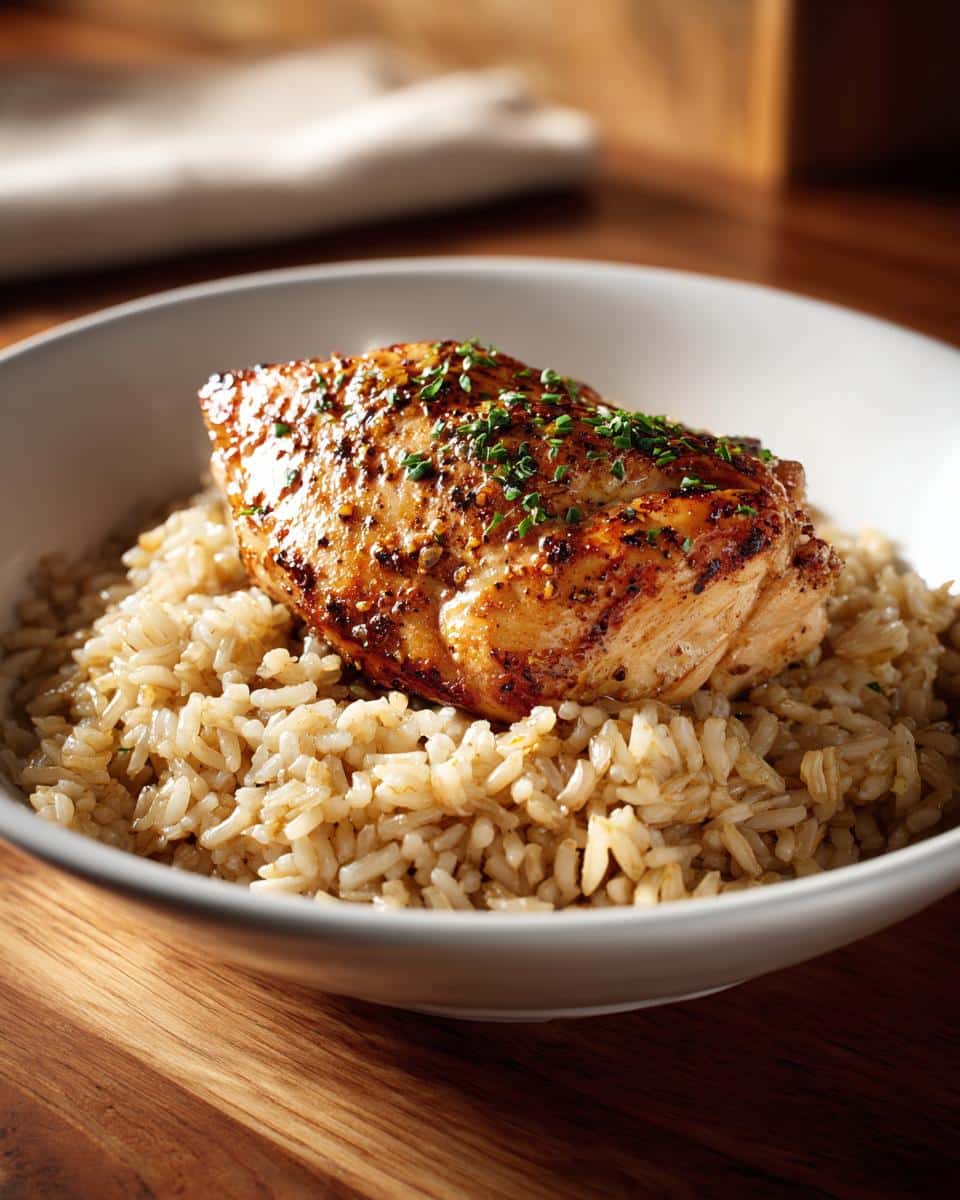
Weeknights are hectic, right? Sometimes you just need a dinner that’s healthy, filling, and doesn’t require you to stare at the stove for an hour. That’s exactly how this recipe for simple **chicken and brown rice** became my absolute go-to. Seriously, I make this at least twice a month!
The real magic here isn’t some complicated sauce or fancy spice blend; it’s the technique. By cooking the rice and chicken separately using super fundamental methods—one simmered patiently, the other seared perfectly—you avoid all that usual gummy rice or dry, sad chicken breast.
It’s the baseline meal I always return to. You throw in some basic seasonings, trust the process, and bam—you have four perfect servings ready to go. If you’ve been looking for that bedrock, no-fail healthy dinner, you’ve just found it! Trust me on this one.
Why This Simple Chicken and Brown Rice Recipe Works for Everyone
This recipe is my secret weapon against weeknight chaos because it’s unapologetically straightforward. You don’t need exotic ingredients or a culinary degree to pull this off successfully, which I love.
- It’s truly low-fuss: Only about 10 minutes of active prep time while everything else cooks itself.
- It guarantees texture: Separating the rice and chicken means no mushy glue!
- Super flexible: You can easily switch up the seasonings or swap the chicken for something else using the same base method.
If you’re ready to simplify without sacrificing flavor, you should definitely check out the basic steps in my full guide here!
Essential Ingredients for Perfect Chicken and Brown Rice
Okay, listen up because this is where ninety percent of weeknight dinners go wrong: ingredients! Since this recipe is so light on steps, we need the ingredients we use to really pack a punch. We aren’t hiding anything behind heavy sauces here. That’s why I preach about using broth instead of plain water for the rice. It sounds like a small thing, but that little boost of flavor is huge!
When you’ve got simple components like this, quality matters. We are keeping things straightforward so the natural flavors of the chicken and the earthiness of the brown rice can shine through. Here’s what you’ll need to pull off my method.
For the Brown Rice Base
This part is simple, but you cannot skip the rinsing step. Trust me, rinsing the brown rice removes excess starch. If you don’t rinse it, you end up with sticky paste instead of fluffy grains.
- 1 cup brown rice
- 2 cups water or broth (use broth if you can!)
- 1/2 teaspoon salt
For Seasoning and Cooking the Chicken
I like to use chicken breasts that are about 6 ounces each—you don’t want huge thick slabs that take forever to cook through evenly. We want consistency here, which is key for reliable cooking times. I keep these seasonings on hand all the time; they’re just good basics!
- 4 boneless, skinless chicken breasts (about 6 ounces each)
- 1 tsp olive oil
- 1/2 tsp garlic powder
- 1/2 tsp onion powder
- 1/4 tsp black pepper
- 1/4 tsp salt (or whatever you need to make it taste great to you)
If you are looking for other simple chicken swaps, check out my notes on five-ingredient uses for chicken and rice here!
Step-by-Step Instructions to Make Chicken and Brown Rice
This is where the magic happens, and honestly, the timing is pretty crucial to get that perfect texture for both the rice and the chicken. Don’t worry, it’s all very logical. We start with the rice because it needs the longest, quietest cooking time. You can use my slow cooker chicken and rice adaptation for a different time saver, but for this method, stick to the stovetop as described below!
Cooking the Brown Rice Perfectly
First things first, make sure you rinse that brown rice until the water runs mostly clear. Combine the rinsed rice, your chosen liquid (broth is best, remember!), and the half teaspoon of salt in the saucepan. Get that going over high heat until it’s bubbling hard. The second it hits a rolling boil, turn that burner way, way down to low. Put the lid on tight—and this is the only real rule to remember—do not lift that lid for 40 to 45 minutes. That trapped steam needs to do its job!
Preparing and Searing the Chicken
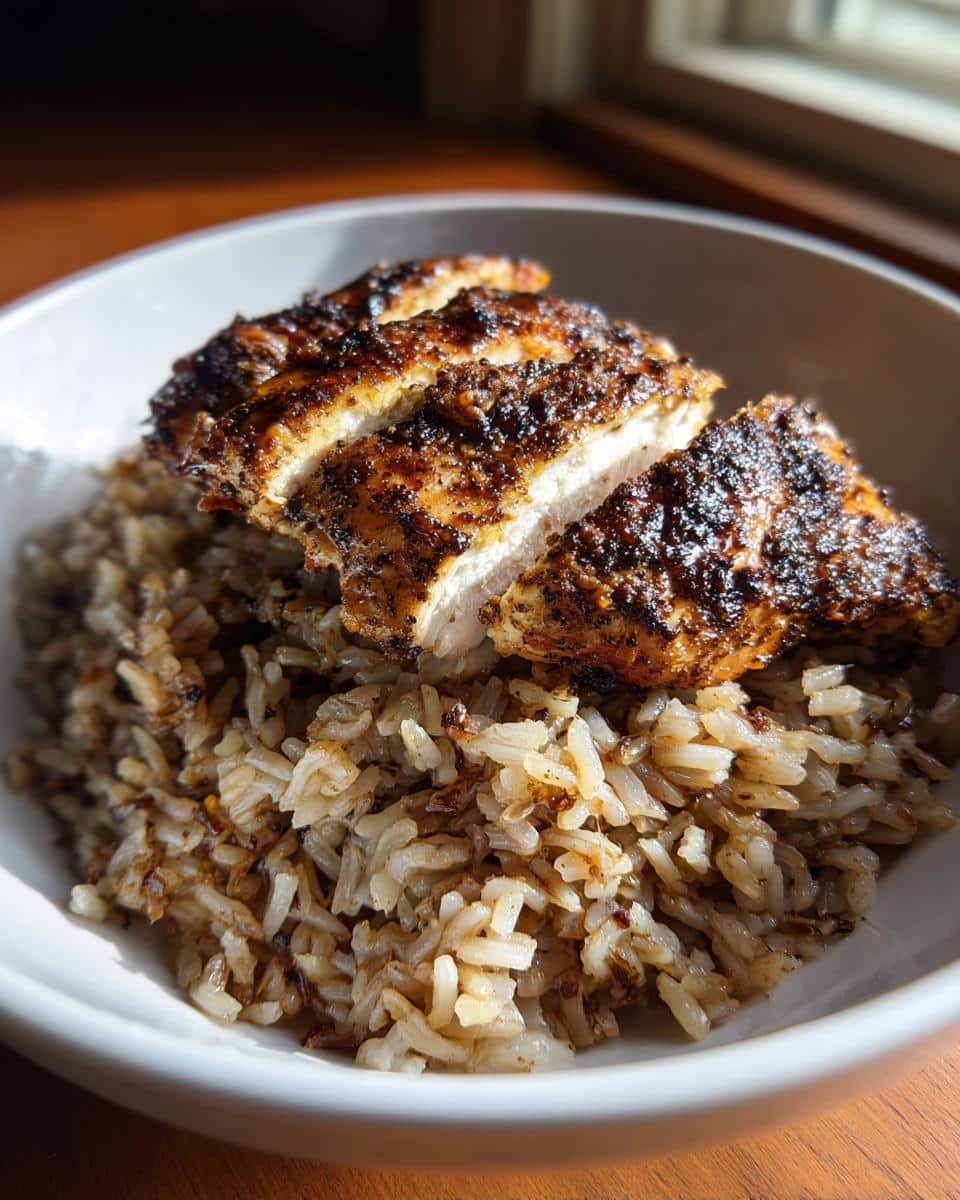
While the rice is happily steaming away, we tackle the protein. Pat those chicken breasts completely dry. Seriously, get them dry. This helps them sear instead of steam! In a tiny bowl, mix up all your seasonings—garlic powder, onion powder, pepper, and salt. Rub that mix all over both sides of the chicken. Heat that teaspoon of olive oil in your skillet over medium-high heat until it shimmers just a bit. Lay the spiced chicken breasts down and cook them for about 5 to 7 minutes per side. You are aiming for an internal temp of 165 degrees Fahrenheit (74 degrees Celsius). Always use a meat thermometer; it’s the only way to guarantee juicy chicken that’s super safe to eat!
Assembling Your Chicken and Brown Rice Meal
Once the chicken hits temperature, pull it out of the pan and let it sit on a cutting board for five whole minutes. This resting part is non-negotiable; while it rests, the juices redistribute, making your finished **chicken and brown rice** meal way less dry. While that’s happening, take the lid off your rice—the 45 minutes should be up! Fluff it gently with a fork, and that’s it. Slice the rested chicken, lay it over that beautiful, fluffy rice, and dinner is served!
If you made extra for your furry friends, make sure you check out my special chicken and brown rice dog food recipe for safe modifications!
Tips for Achieving the Best Chicken and Brown Rice Texture
Look, even with the best instructions, sometimes things go a little sideways in the kitchen. That’s okay because I’ve fine-tuned this **chicken and brown rice** combo over years of testing, and I know exactly where people run into trouble spots. Nine times out of ten, it’s about texture, right? Nobody wants dry meat or gluey rice.
The biggest texture secret for the rice isn’t the brand you buy; it’s the environment you cook in! If you live somewhere really dry, or if you’re up at a higher altitude where water boils differently, that 2 cups of liquid might not be enough for that long simmer. You need that steam sealed in tight, but if you notice the water disappearing too fast before the 40 minutes is up, just drop the heat even lower before lifting the lid. A tiny adjustment makes a world of difference so you don’t have hard, undercooked grains.
For the chicken side of things, the only way to guarantee moisture is to invest in a good instant-read thermometer. Chicken breast is so lean that the difference between perfectly cooked and hockey puck status is maybe 90 seconds. Pull it off the pan the second it hits 165°F. Seriously, resist the urge to poke it again! That five-minute rest afterward helps it finish cooking gently while the juices settle back in. These little habits—checking altitude humidity and trusting your thermometer—are what turn a basic meal into your favorite healthy staple. If you need more ideas on using similar components, check out some easy homemade dog food recipe ideas for inspiration on blending proteins and grains simply!
Ingredient Substitutions for Your Chicken and Brown Rice
I get it! Not everyone has boneless chicken breasts sitting in the fridge, or maybe you’re just bored of brown rice this week. That’s totally fine. The best part about relying on simple, foundational recipes like this **chicken and brown rice** dish is that the method travels really well between ingredients. You just have to tweak your timing!
Don’t think you need to run to the store for exact matches. The flavor profile of the seasoning mix—garlic, onion, salt, pepper—is so versatile it holds up beautifully with different proteins. It almost feels like cheating how easily you can switch things up!
Here are a few swaps I make all the time when I’m feeling restless:
- For the Chicken: You can absolutely use boneless, skinless turkey cutlets; just watch the time closely because they tend to dry out faster than chicken breast. Thin-cut white fish fillets, like cod or tilapia, are great too, but you need to sear those for only 3 minutes per side total!
- For the Brown Rice: If you need it faster, swap for white rice, but radically cut the simmer time down to about 15 to 20 minutes, lid firmly on. Quinoa is another fantastic substitute; it usually needs a 1:2 ratio (grain to liquid) and simmers for about 15 minutes until done. Just remember to rinse quinoa really well, too!
When you move away from brown rice, remember that you change the entire cooking process. Always refer back to the package directions for your specific grain substitute, but stick to our 1:2 liquid ratio to start! For alternative healthy grain mixes, take a look at some vet-approved homemade dog food recipes—they focus heavily on healthy grains and often give great cooking ratios!
Serving Suggestions for Your Simple Chicken and Brown Rice
When you have a bedrock meal like this, sometimes the fun part is just dressing it up without adding a ton of extra work. We’ve got the protein and the grain sorted, but a completely plain plate can feel a little… serious, you know? I always keep a few easy additions in my back pocket to make this simple dinner feel gourmet without dirtying five extra pots!
Because the chicken seasoning is so savory and simple, this dish pairs well with anything that brings a pop of color or a little acidity. The goal is to complement the meal, not fight with it. A heavy, creamy sauce would just weigh everything down, and we want to keep that healthy, light feeling!

Here are my favorite ways to bulk this out into a full, satisfying meal:
- Steamed Greens: Keep it classic! A big helping of steamed broccoli or crisp green beans tossed with just a dribble of lemon juice and maybe a tiny pinch of salt is perfection right alongside the chicken. They cook while the chicken is resting, so the timing works out nicely.
- A Quick Pan Sauce: After you pull the chicken, pour just a splash of chicken broth into that hot skillet. Scrape up all those yummy, browned bits stuck to the bottom—that’s called fond, and it’s pure flavor! Let that simmer for just a minute, and drizzle that thin pan juice right over the breast meat.
- Fresh Herbs: If you happen to have parsley or even some fresh thyme growing, chopping it up and sprinkling it over the top just before serving adds so much freshness. It smells fantastic, too!
- A Touch of Umami: I sometimes stir a teaspoon of low-sodium soy sauce into the cooked, fluffed rice right at the end. It gives the rice a little color and a lot more depth instantly.
If you’re looking for something to serve *before* this simple meal, check out some easy appetizer ideas that won’t spoil your main course!
Storing Leftover Chicken and Brown Rice
One of the great things about making a simple meal like this **chicken and brown rice** is that it reheats surprisingly well, which is essential for me since I always seem to make too much! Don’t just toss it all into one container, though. That’s a rookie mistake that guarantees either soggy chicken or hard, dry rice when you try to eat it later.
When it comes to storage, separation is key. Keep the chicken and the rice in two separate airtight containers. This lets you control the reheating process for each component perfectly. If you store them mixed, the rice soaks up all the juices from the chicken, and you end up with a weird, unified texture disaster.
You can safely keep your storage containers in the fridge for about three to four days. Any longer than that, and you really start risking quality, especially with the chicken breast.
Reheating the Chicken to Keep It Juicy
This is the most important step! Microwaving chicken breast directly often turns it rubbery immediately. You want to reintroduce some steam!
- If you have thick slices, try adding a *tiny* splash of broth or water to the bottom of a microwave-safe dish—just a teaspoon or two.
- Cover that dish tightly with a lid or plastic wrap, making sure to vent one corner slightly.
- Heat in short 30-second bursts on medium power, rather than blasting it on high. This gentle reheating steams the chicken back to life beautifully.
Reheating the Brown Rice
Brown rice tends to hold onto moisture a little better than white rice, but it can still dry out if you reheat it too aggressively. I never use a dry microwave for this.
The best method is a quick steam. If you have a small steamer basket, that’s ideal. If not, you can skip the broth in the dish and simply put a small spoonful of water right on top of the rice before covering. Heat for about 60 to 90 seconds, depending on how much you are reheating. Once it’s warmed through, give it a good fluff with a fork, and it will be almost as good as fresh!
Following these separate reheating steps ensures your leftover **chicken and brown rice** tastes fantastic on day two or three!
Frequently Asked Questions About Chicken and Brown Rice
I know you might have some lingering questions, especially once you start thinking about how to make this fit into your busy life. Meal planning and ingredient swaps are always on my mind too! Since this recipe prioritizes texture, people ask me a definite few things about technique and timing. Here are the quick answers to keep your weeknight cooking totally smooth!
If you need more tips on using these simple meal components for your pets, I’ve dropped some helpful articles in my dog food tips section!
Can I cook the chicken and brown rice together in one pot?
Oh, temptation strikes! I know it seems like the ultimate shortcut, but please, don’t do it if you want the best texture. If you cook everything together, the chicken releases juices that mess with the starch in the rice, turning it into mush. Plus, the rice needs that long, covered simmer time, and the chicken will be wildly overcooked and tough by the time the rice is actually done. It’s a textural nightmare, honestly! Separating them guarantees fluffy rice and perfectly tender meat every single time.
How long does brown rice take to cook if I don’t use broth?
That’s an easy fix! If you skip the broth and use plain water instead, the cooking time for the brown rice doesn’t change dramatically, but you do lose a little bit of flavor depth. You still need that full 40 to 45 minutes simmer time with the lid sealed tight. The liquid ratio (1 part rice to 2 parts liquid) stays the same, but the cooking windows for brown rice are pretty fixed because it’s such a hard grain. Just be extra sure that liquid is salted well if you’re only using water!
Is this recipe suitable for meal prepping?
Absolutely, this is one of my top meal prep recipes! Since this simple **chicken and brown rice** combo holds up so well, I often double the recipe on Sunday and have my lunches set for the next few days. The key is exactly what I talked about in the storage section: keep the rice and chicken separate! When they aren’t touching, they both reheat much better throughout the week.
The chicken stays moist, and the rice stays fluffy. If you are looking for more ideas on doing batch cooking for healthy meals, you can check out the best ways to execute dog meal prep ideas, which often share great principles for human meal prepping too!
Next Steps After Making Your Chicken and Brown Rice
Now that you’ve got this fantastic, no-fuss **chicken and brown rice** sitting on your plate, I want to hear all about it! Seriously, knowing that something this simple made it onto your dinner rotation makes my day. Don’t just eat it silently; come back and tell me how it went!
Did you stick to the basic seasonings, or did you decide to get fancy with some smoked paprika or maybe a little cayenne pepper? Every person’s kitchen works a little differently, and your tweaks are invaluable to the next reader looking for inspiration.
Please, take a minute to drop a comment below and give the recipe a rating. Even just clicking five stars tells me you nailed the technique! And if you snapped a quick photo of your perfectly seared chicken on top of that fluffy brown rice, tag me on social media! I absolutely love seeing your successful dinners. Let’s keep building this collection of easy, healthy staples together!

Simple Chicken and Brown Rice
Ingredients
Equipment
Method
- Rinse the brown rice under cold water. Combine the rinsed rice, water or broth, and 1/2 teaspoon of salt in the saucepan. Bring the mixture to a boil over high heat.
- Once boiling, reduce the heat to low, cover the saucepan with a tight-fitting lid, and simmer for 40 to 45 minutes, or until all the liquid is absorbed. Do not lift the lid during this time.
- While the rice cooks, prepare the chicken. Pat the chicken breasts dry with paper towels. In a small bowl, mix together the garlic powder, onion powder, pepper, and 1/4 teaspoon of salt.
- Rub the seasoning mixture evenly over both sides of the chicken breasts.
- Heat the olive oil in a skillet over medium-high heat. Place the seasoned chicken breasts in the hot skillet.
- Cook the chicken for 5 to 7 minutes per side, or until the internal temperature reaches 165 degrees Fahrenheit (74 degrees Celsius) and the juices run clear. Adjust cooking time based on the thickness of the chicken.
- Remove the chicken from the heat and let it rest for 5 minutes before slicing or serving. Fluff the cooked brown rice with a fork.
- Serve the sliced chicken immediately over the brown rice.