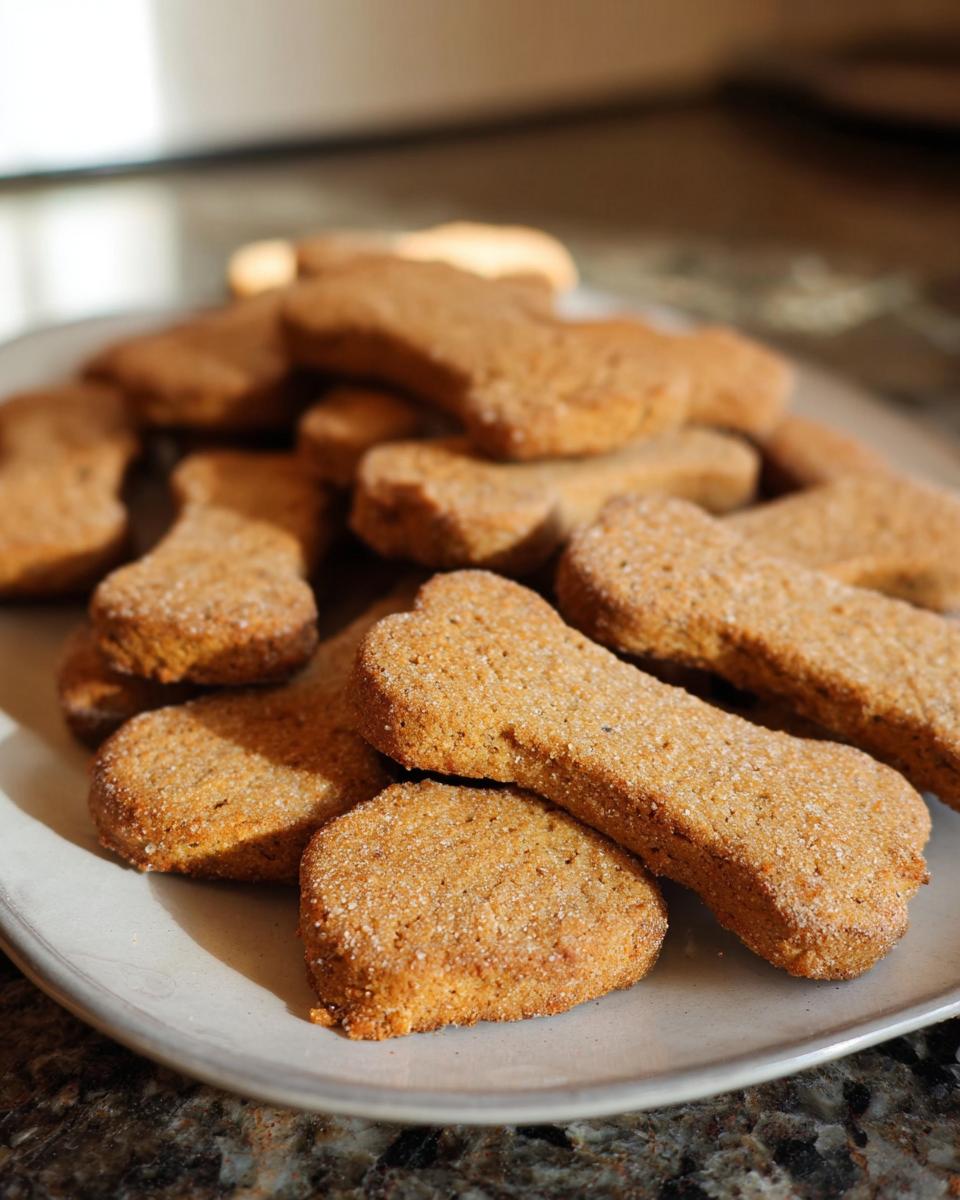
Oh, you know how much joy it brings when your furry best friend hears that little rattle of the treat jar? It’s the best sound, isn’t it? But sometimes walking down the pet aisle, all those labels leave me scratching my head. What exactly are we feeding them? That’s exactly why I came up with these Simple Dog Biscuits. Trust me, I believe in knowing exactly what goes into my body, and that absolutely extends to my pup!
This recipe is my go-to because it hits all the right notes: it’s unbelievably easy, super affordable, and it uses common pantry staples like pumpkin and peanut butter. We’re talking minimal steps and maximum tail wags here. If you’re new to baking for your pet, or just looking for quick easy dog treat ideas, these are the answer. You get those amazing homemade dog biscuit recipes without any fuss!
Why These Simple Dog Biscuits Are Perfect for Beginner Dog Biscuit Baking
If you’ve been scrolling through complicated recipes feeling totally overwhelmed, take a deep breath. These are for you! These Simple Dog Biscuits are truly designed for the kitchen novice. There is no fancy equipment needed besides a big bowl and maybe a rolling pin. We aren’t dealing with fussy folding or complicated temperature curves here.
The steps are straightforward: mix the wet stuff, mix the dry stuff, smush it together, and bake. That’s it! Even if you haven’t baked anything since middle school home-ec, you can ace this batch. These are exactly the kind of easy dog treat ideas that build confidence in the kitchen.
Affordable Dog Biscuit Options You Can Make Today
Let’s talk about the wallet for a second. Store-bought treats, especially the “natural” ones, can really add up! But look at what we’re using here: flour, eggs, and a little bit of whatever puree you have handy. These are definitely affordable dog biscuit options.
Since we’re leaning heavily on pantry staples like brown rice flour and peanut butter instead of specialty ingredients, you probably already have most of what you need. It feels so much better knowing that you spent pennies on superior ingredients your pup loves!
Gathering Ingredients for Your Simple Dog Biscuits
Okay, the absolute best part about these Simple Dog Biscuits is that the ingredient list feels delightfully simple. We are grouping ours into the “Wet Stuff” and the “Dry Stuff” because that’s how we keep things organized in my kitchen!
For the wet items, we need one cup of your chosen base—I usually reach for pumpkin puree, but mashed banana or cooked carrots work great too—and two nice big eggs. The flavor powerhouse here is the natural peanut butter. Remember, we need 1/4 cup, but you have to check the label! Make absolutely sure there is no xylitol in there. Zero exceptions!
Then we get into the little health boosters: pumpkin seeds, flax seeds, and chia seeds. These are what make these treats feel intentional and nourishing, not just filler.
The dry side is super easy: just 3 cups of either brown rice flour or whole wheat flour. Keep a little extra flour handy on the counter for rolling later, but that’s it for the shopping list!
Ingredient Notes and Smart Substitutions for Simple Dog Biscuits
Don’t panic if you don’t have all three seeds memorized! The recipe says you can swap them around. If you only have flax, use 2 tablespoons of just that. Easy peasy accommodation, right there.
Also, if your dog isn’t a huge pumpkin fan, you have options! Unsweetened applesauce works perfectly as a direct swap for moisture. The key with the peanut butter is always double-checking for xylitol; that stuff is seriously toxic for dogs, so I always give the jar a quick once-over before I even measure.
Essential Equipment for Making Simple Dog Biscuits
Before we dive into the mixing frenzy, let’s make sure your kitchen is ready for action. Getting your tools out beforehand is just good weekly dog food prep—it saves so much time later!
For these Simple Dog Biscuits, you don’t need a fancy stand mixer. I just use what I have lying around! Here is what you’ll pull out:
- A big old mixing bowl—the larger, the better for minimizing flour dust explosions!
- Something to grind your seeds—a small blender, spice grinder, or food processor works perfectly for turning those flax and pumpkin seeds into powder.
- A trustworthy cookie sheet for baking.
- A rolling pin for getting that even dough thickness.
- Your favorite cookie cutter or, honestly, just a sharp kitchen knife if you prefer rustic rectangles!
Step-by-Step Instructions for Perfect Simple Dog Biscuits
Alright, time to get messy! Because we are aiming for those wonderfully crunchy Simple Dog Biscuits, our first non-negotiable step is getting the oven fiery hot. Go ahead and preheat that baby to 325°F (170°C). Then we hit the wet ingredients in that large bowl. Whisk your pumpkin, eggs, and that safe-for-dogs peanut butter until they look nicely combined. Don’t use electric mixers here; we want a simple blend!
Next up is grinding those optional superpowers: the pumpkin, flax, and chia seeds. Toss them into your spice grinder or little blender and blitz until they are powdery. Stir that powder right into your wet bowl. Now, grab the flour and start mixing it in with a spoon until it looks like shaggy crumbles. When it gets too hard for the spoon, jump in with your hands until you have a firm, sticky dough ball. If it feels too soft to handle, just throw in a tablespoon more flour at a time.
Mixing the Dough for Your Simple Dog Biscuits
I always divide the dough right in half before rolling because it’s so much easier to manage two smaller pieces than one giant lump of sticky dough. Sprinkle your counter nicely with flour—this is key! Take one ball and roll it out until it’s just a little thicker than a quarter, so maybe about ⅜ of an inch thick. You want them sturdy enough to stand up to enthusiastic chewing!
Use your cookie cutters or just take a sharp knife and cut neat little squares or whatever shape your dog prefers. Roll up your scraps—don’t waste any dough—and cut more shapes until that bowl is empty. Lay them out on your ungreased cookie sheet, giving them a little space to breathe.

Cutting and Baking Your Simple Dog Biscuits
Pop those babies into the preheated oven. The baking time really depends on how big you cut them. For smaller shapes, start checking around the 30-minute mark. If you made larger biscuits, you might need closer to 40 minutes.
What are you looking for? You want them to look dry and feel firm to the touch. They shouldn’t be pale anymore; they should have some nice toasted edges. Once they are done, pull them out and let them cool completely before you try storing them. That cooling step is vital for achieving that perfect crunch we’re after!
Achieving Ultimate Crunch: Drying Time for Simple Dog Biscuits
Okay, listen up—if you want these Simple Dog Biscuits to last longer than five minutes in my house, you need to commit to the drying phase. Baking them for 30 to 40 minutes gets them cooked, but the drying process makes them properly hard and crunchy for storage.
You have two great options depending on your oven schedule. If I’m making a huge batch, I just turn the oven off after they’re baked and leave them inside for a few hours to slowly dry out. If you’re busy, just leave them out on a cooling rack uncovered for a full day, maybe two. They’ll harden right up!

Storage and Keeping Your Homemade Simple Dog Biscuits Fresh
Now that you’ve just made your wonderful Simple Dog Biscuits, you need to know how to keep them perfect. The beauty of baking them until they are completely dry is amazing storage potential!
For daily munching, you can keep them right in an airtight container or Ziploc bag on your counter at room temperature for up to a whole month. Seriously, they last that long if they are fully dried out!
If you’re like me and like to bake huge batches—because why wouldn’t you?—toss the extras straight into the freezer. They stay good in there for up to six months. I made a double batch last month and honestly, they were gone in three weeks because my Labrador, Charlie, kept finding the container! They are just too good!

Frequently Asked Questions About Simple Dog Biscuits
I know you probably have the dough half-mixed already, but hold on a second! It’s always smart to run through a few quick questions—especially around safety and swaps—before you slide that tray into the oven. Knowing the little details really helps ensure we’re making the best Homemade Dog Biscuit Recipes possible for our pups.
People ask me all the time about flour, which makes sense since we listed brown rice flour. And storage? That’s a big one too! I’ve tried to cover the most common roadblocks in this little Q&A.
Can I use regular all-purpose flour instead of brown rice flour in these Simple Dog Biscuits?
Yes, you totally can! Brown rice flour is great because it’s easy to digest for many dogs, but if you don’t keep it stocked, regular whole wheat flour works just as well in this recipe. Think 1:1 substitution—3 cups of all-purpose flour for the 3 cups of brown rice flour. No need to adjust anything else!
How do I know if my Simple Dog Biscuits are fully baked?
This is important for that crunch factor! When they come out of the oven after 30 to 40 minutes, the biscuits should look dry. They shouldn’t feel soft or squishy in the middle. If you press one gently, it should feel firm. If they still feel slightly yielding, pop them back in for 5 or 10 more minutes. Remember, the longer you bake them, the crunchier they get!
Estimated Nutritional Data for Simple Dog Biscuits
Now, I know what you’re thinking—do I need to track dog food calories? Probably not, but giving them something clean knowing what’s in it is supportive, right?
Because we used natural ingredients and didn’t add any sugars or oils on top of what’s already present, these Simple Dog Biscuits are a clean option. Based on the pumpkin, flour, and peanut butter amounts, the numbers will be low, but please know every batch varies.
Generally, for one biscuit, you are looking at very low figures for Calories, Fat, Protein, and Carbohydrates across the board—all coming from whole-food sources. This is simply guidance because the exact nutritional breakdown will change based on the type of flour and peanut butter you use!
Share Your Success with These Simple Dog Biscuits
Now that you’ve got the oven cooling down and a mountain of wonderful, safe Simple Dog Biscuits ready to go, I really want to hear from you! That’s the best part of sharing these recipes—seeing them actually in action in your homes.
Did your dogs go totally wild? Did they prefer the pumpkin or the banana version? Don’t be shy! Please leave a quick rating right here on the recipe card so other bakers know what you thought. And if you snap a picture before your pup devours the whole batch, tag me on social media!
Sharing our little wins—whether it’s learning to bake something new or just making a batch of treats that keeps your best friend happy—is what building healthy habits is all about. I’m so excited for what you and your dog create together!
By EMILIA, founder of MeltItClean.com – your digital space for natural weight loss, real wellness habits, and clean-living inspiration that actually fits your life. For years, I struggled with the ups and downs of dieting. I tried everything — juice cleanses, low-carb crazes, fitness challenges — but I always ended up back where I started: tired, bloated, and frustrated. I didn’t just want to “lose weight” — I wanted energy, mental clarity, glowing skin, and confidence without sacrificing my joy or sanity. After years of experimenting, learning, and unlearning, I discovered a simple truth: your body is already powerful — it just needs support, not restriction. That’s when I created Melt It Clean — a site dedicated to real transformation through clean, intentional, and nourishing daily habits that anyone can follow. My goal was simple: build a place where people could feel informed, supported, and empowered without being overwhelmed by wellness fads.
You know, when I talk about clean living and supporting your body for real wellness transformation on Melt It Clean, that mentality absolutely trickles down to my furry family members. Just like I got frustrated with restrictive diets, I got frustrated with overly processed, mystery-ingredient dog snacks!
For me, finding that simple, supportive truth in my own wellness journey—that my body needed nourishment, literally, not punishment—made me look at Buster’s treat bag the same way. Why are we feeding them junk when we can whip up something genuinely wholesome in about forty minutes?
Making these Simple Dog Biscuits connects my wellness passion right to my puppy devotion. It’s about intentional, clean habits, whether you’re making a smoothie for yourself or baking pumpkin and peanut butter treats for your best friend. No stress, just real food supporting real health. I hope you feel that same sense of empowerment baking these for your dog!
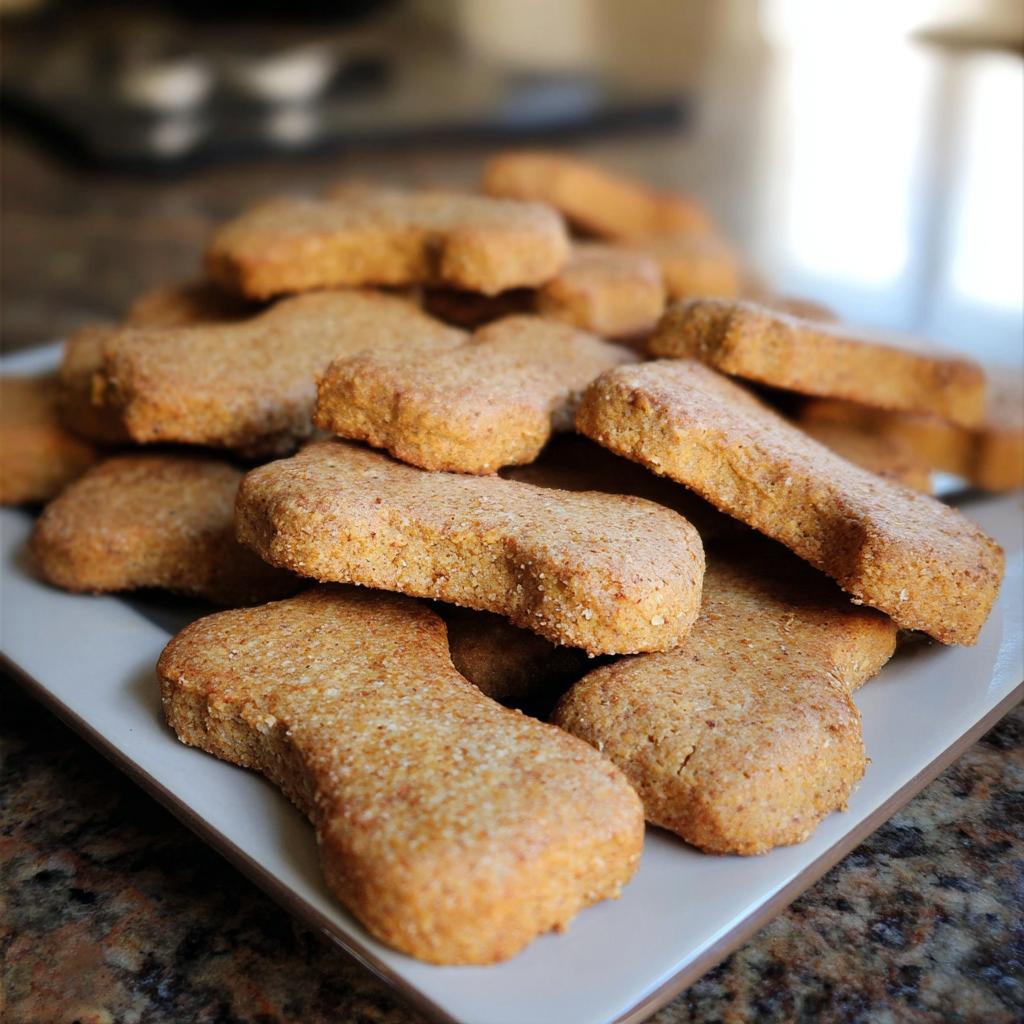
Simple Dog Biscuits
Ingredients
Equipment
Method
- Preheat the oven to 325°F (170°C).
- In a large bowl, whisk together the puréed fruit or vegetable of your choice with the eggs, peanut butter, and any optional add-ins you choose to use. If using fish oil gel capsules, poke them with a pin or the tip of a sharp knife and squeeze the oil into the dough; discard the empty capsules.
- Grind the pumpkin seeds, flax seeds, and chia seeds together in a blender, coffee or spice grinder, or food processor. Stir them into the wet mixture.
- Add the flour and mix the dough with a spoon until it is in shaggy crumbles, then mix it with your hands until it makes a firm, sticky dough. If it is too soft to roll, work in a bit more flour, one tablespoon at a time. Divide the dough into two balls.
- Sprinkle the work surface lightly with the flour you used for the dough, and roll out one ball of dough to a thickness of a bit more than ¼ inch/about .75 cm.
- Cut out dog treat shapes with a cookie cutter, or use a kitchen knife to cut the rolled-out dough into rectangles the size best for your dog. You can also roll the dough into walnut-sized balls, then roll each ball into a cylinder about 3 to 3½ inches long. Re-roll the scraps, and cut more biscuits until all the dough is used up.
- Lay the homemade dog biscuits onto an ungreased cookie sheet.
- Bake for 30 to 40 minutes until the biscuits are dry and firm. Small biscuits need 30 minutes; larger biscuits need up to 40 minutes. Allow to cool.
- If you want the biscuits to be completely hard and crunchy, leave them in the oven to dry out after the oven is turned off, or leave them out on a rack, uncovered, at room temperature for 1 to 2 days, until they are dried out.