You know how sometimes you just want to give your pup a little something special that isn’t packed with weird fillers from the store? Mealtime is important, but so are those little in-between moments! That’s why I’m absolutely obsessed with showing you how to make these incredible blueberry and coconut gummies for dogs. Seriously, they are so simple—just a few wholesome ingredients that you probably already have. They come together fast, they are wonderfully chewy, and my little guy, Buster, goes absolutely bananas for them. We’ve tested batches upon batches, and this specific combination of fruit and fat is a definite winner!
Why You Will Love Making Blueberry and Coconut Gummies for Dogs
Honestly, there’s no better feeling than knowing exactly what you’re feeding your best friend. When I pull this gummy tray out of the fridge, I just feel good about these treats. They pass the Buster Test every time, which is high praise around here!
- They whip up in practically no time—I’m talking under 20 minutes of actual work!
- We skip all the cheap fillers; it’s just real fruit and healthy fats from the coconut milk.
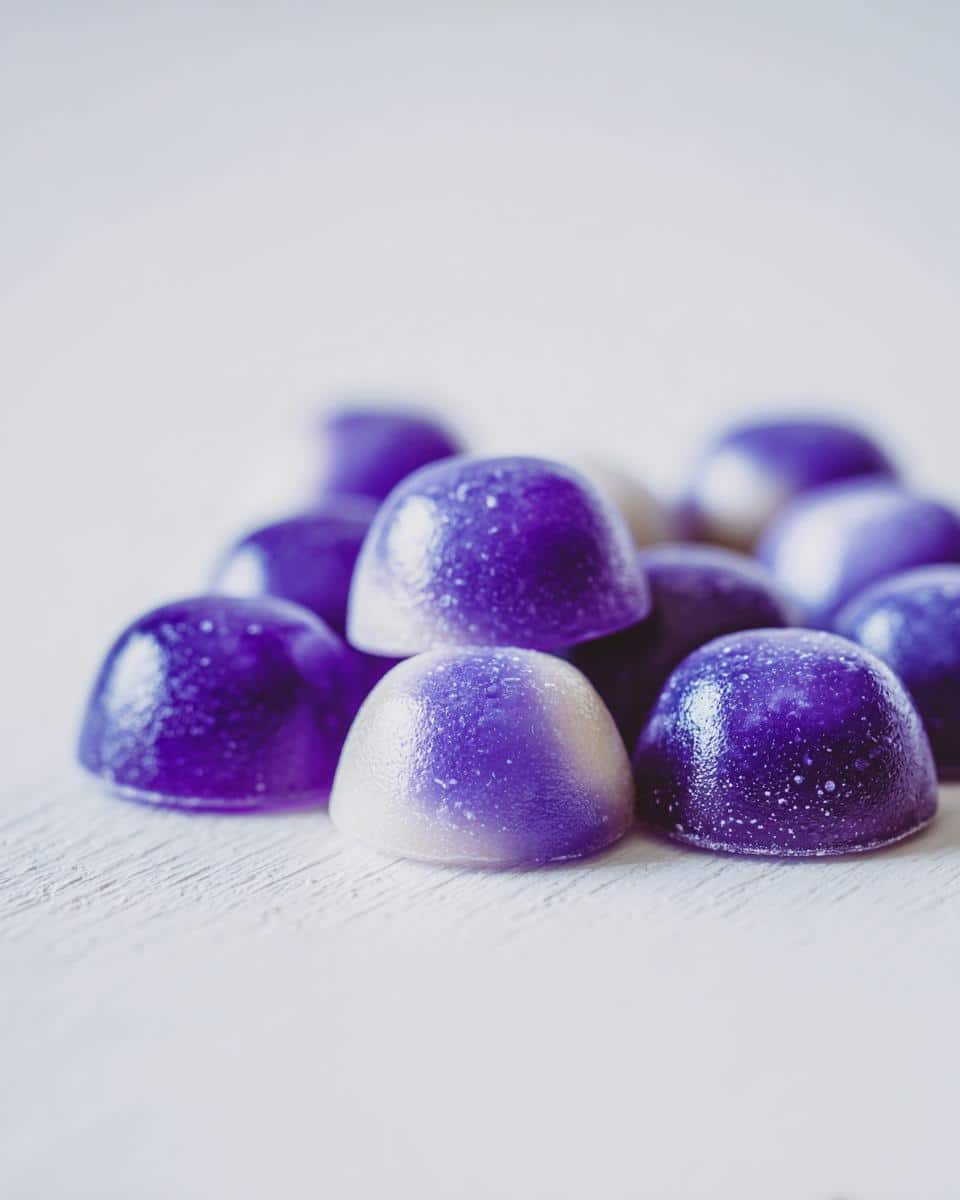
- They have a great bouncy texture that dogs just dig, and they’re easy on older teeth.
If you’re looking to fill up your treat jar quickly with something you can trust, run, don’t walk, to check out these easy homemade dog treats to see what else you can whip up!

Essential Equipment for Perfect Blueberry and Coconut Gummies for Dogs
When we make these wonderful blueberry and coconut gummies for dogs, you don’t need a bunch of fancy gadgets, thankfully! You absolutely need a small saucepan for dissolving that gelatin base, and you’ll want a sturdy whisk to keep things smooth. The real star, though, is the silicone mold.
I really recommend using small molds—think tiny half-spheres or little squares. Why small? Because these are treats, right? Small portions mean they chill faster, and Buster likes having several little bites rather than one giant one. It just makes treating easier!
Gathering Ingredients for Your Blueberry and Coconut Gummies for Dogs
Okay, let’s talk ingredients because this is where we build the foundation for amazing blueberry and coconut gummies for dogs. We’ve got two main camps here: the Gummy Base and the Flavoring bits.
For the base, you need one cup of water and four tablespoons of unflavored gelatin powder. Don’t skip the blooming time! Then grab 1/4 cup of the full-fat, unsweetened coconut milk—make sure you stir that can really well before measuring because the good fat separates.
As for the flavor, we’re keeping it clean: 1/2 cup of fresh or frozen blueberries. If you use frozen ones, just thaw them out first so they blend nicely. If you want to see how I use similar concepts for savory treats, check out these bone broth gummies recipe ideas!

It’s this simple combination—gelatin for the chew, coconut milk for richness, and blueberries for that gorgeous color and antioxidant boost—that makes the final product taste so good to them.
Step-by-Step Instructions: Preparing Blueberry and Coconut Gummies for Dogs
This is where the magic happens, and honestly, it’s just so satisfying watching this liquid turn into those perfect little chewy bites. We are making these blueberry and coconut gummies for dogs right on the stovetop, but remember, low and slow is the name of the game here. We don’t want to cook the goodness out!
Blooming the Gelatin Base
First things first, listen up: gelatin needs a little nap! Pour 1/4 cup of your water into that small saucepan—just a little splash to get things started. Now, sprinkle those four tablespoons of gelatin powder evenly right over the top. Don’t stir it! You have to let it sit there quietly for a full five minutes to bloom. This step is non-negotiable; it helps hydrate the powder so it dissolves smoothly later on.
Dissolving Gelatin and Adding Coconut Milk
Once your five minutes are up, pour in the rest of the water—that’s 3/4 cup—and then whisk in your rich coconut milk. Set the pan over medium-low heat. You’ll need to whisk constantly, just gently, until you see that powder completely disappear into the liquid. I mean *completely* dissolved. The big rule here? Do not let this mixture boil! Boiling ruins the gelling power. We just want it warm enough to melt everything together perfectly.
Pureeing Blueberries and Combining Flavors
While that’s warming up, you need to deal with those beautiful blueberries. Toss them into a mini blender or use an immersion blender right in a separate little cup to make a smooth puree. You want it silky! My personal trick: if your fresh berries have any tiny skins left, push that puree through a fine-mesh sieve. It makes the gummies so much smoother, Buster definitely notices the difference.
When your gelatin liquid is clear and lump-free, take the saucepan right off the heat. Now, stir in that blueberry puree until the whole pan turns a lovely uniform purple-blue color. You know, if these weren’t for the dog, I’d be tempted to add some calming chamomile to the mix—you can see how I do that for my calming chamomile gelatin gummy dog treats recipe!
Molding and Chilling Your Blueberry and Coconut Gummies for Dogs
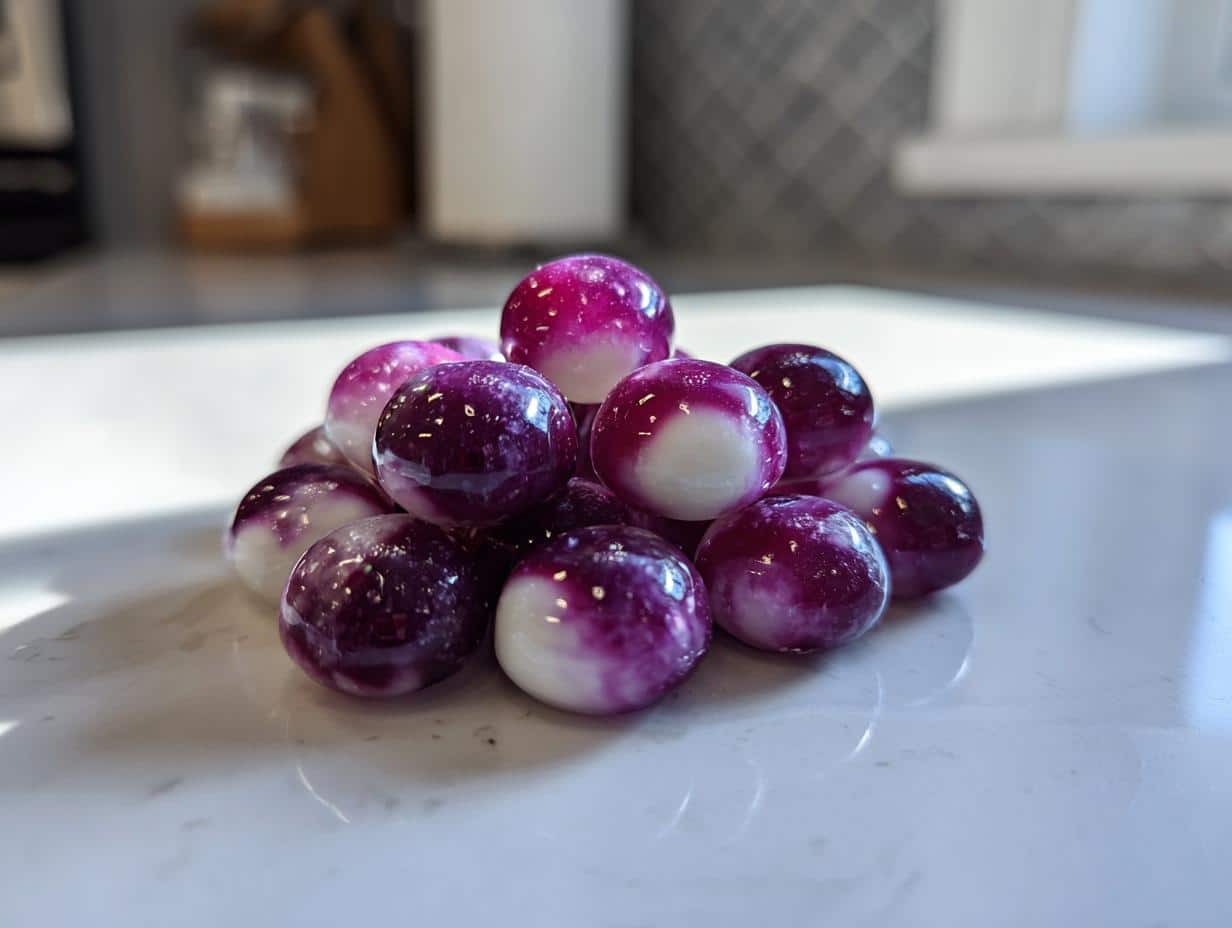
Pour that warm, lovely mixture slowly and carefully into your silicone molds. They look so empty at first, but don’t overfill them! If you have a tiny bit left over, just toss it; don’t try to force it into a mold you don’t have room for. Then, and this is the waiting game, cover the whole tray gently and pop them into the refrigerator. They need a minimum of two hours to get really firm. If you press one gently afterward, it should bounce right back. If it’s squishy, give it another thirty minutes! For more fun chilly ideas, check out my guide on frozen blueberry banana recipes.
Ingredient Notes and Substitutions for These Dog Gummies
I always get questions about swapping ingredients, especially when making these blueberry and coconut gummies for dogs. The recipe specifies full-fat coconut milk because that little bit of richness really helps the texture stay beautifully soft and chewy. It makes them hug the gums just right!
Now, if you don’t have coconut milk handy, you *can* use plain water instead. But I must warn you: the treats will be slightly less rich and might feel a tiny bit firmer when fully set. It’s not a disaster, but the coconut milk version is just top-tier chewy!

Before we wrap up the ingredient talk, please, please remember this: Even though these are natural, always check with your vet before introducing any new food into your dog’s regular rotation, especially if they have specific sensitivities. Better safe than sorry with our furry pals! If you’re looking for other simple, natural ideas, you should peek at these dog biscuit blueberry recipes next.
Tips for Success When Making Blueberry and Coconut Gummies for Dogs
Making these blueberry and coconut gummies for dogs is usually super smooth, but gelatin can sometimes be stubborn! If you find your gelatin powder is just sitting on top of the water and won’t bloom correctly in step one, try warming the initial 1/4 cup of water up just a touch before sprinkling. It helps wake those little gelatin granules right up!
Another thing I learned through messy experience? Unmolding! If your silicone mold is brand new or just being difficult, give the cavities a super light brush with some vegetable oil before you pour in the mixture.
The oil won’t change the final product because the gummies are mostly water, but it makes popping them out afterwards—when they are perfectly set—a breeze. No tearing! For more ideas on simple chews, definitely look through simple natural dog treat recipes for inspiration between batches!
Storage and Serving Suggestions for Blueberry and Coconut Gummies for Dogs
So you’ve made about 30 perfect little blueberry and coconut gummies for dogs—now what? The good news is that because they are mostly water and gelatin, they stay fresh nicely, but not forever! You absolutely must keep these in an airtight container in the refrigerator.
Trust me, if you leave them sitting out on the counter, they get sticky and sad pretty fast. Stored correctly in the fridge, they last beautifully for up to one week. Think of them as fresh produce for your dog! They are fantastic as an occasional, healthy reward. If you want something that lasts longer or feels extra cool on a hot day, check out my fun pupsicle recipes for dogs, too!
Frequently Asked Questions About Blueberry and Coconut Gummies for Dogs
Are these blueberry and coconut gummies safe for my puppy?
That’s a great question about feeding these to the little ones! Generally, yes, these homemade treats are wonderful because you control the ingredients. However, puppies have very sensitive tummies. While blueberries are packed with antioxidants, you should always introduce any new treat slowly. Start with just one tiny piece and watch for any upset tummies. If you’re looking for safer stuff for very young dogs, you should absolutely look at my list of the best puppy treat recipes for ideas!
Can I substitute the blueberries with other fruits?
You absolutely can experiment with other fruits in these blueberry and coconut gummies for dogs! Strawberries work beautifully, or a mashed raspberry puree is fantastic. Just be careful with fruits that are very high in water content, like watermelon, because that can throw off the gelatin balance and make your gummies too soft. Remember, the goal is that perfect chewy texture!
How do I know when the gummies are fully set and ready to pop out?
Don’t rush the chilling part! You need to see them completely firm up. The best test is simple: push gently on the side of one gummy with your finger. If it springs right back and doesn’t leave a dent, they are done chilling. If your finger leaves a marshmallowy impression, they need more cold time. Seriously, give them the full two hours, or even longer if your fridge is super full!
Why do my gummies feel a little sticky on the outside?
It happens! That light tackiness usually means they are reacting slightly to the air moisture, or maybe they were just a hair under-chilled. Don’t worry, it doesn’t mean they ruined them. If they are still too sticky to handle, you can try letting them air dry on a piece of parchment paper for about an hour outside the fridge. That usually helps wick away the surface moisture without drying out the chewy center we worked so hard for!
Estimated Nutritional Data Per Serving
When we talk about treating our dogs well, I know folks are curious about what exactly is in those little bites of heaven. Since these blueberry and coconut gummies for dogs are made with such simple, whole ingredients, the totals are wonderfully low! Remember, these values are my best estimate based on the ingredients used, calculated for one single gummy.
Each gummy comes in around 15 calories. You’re looking at roughly 0.5 grams of fat, about 2 grams of carbohydrates, and only 1 gram of protein. They are essentially a fantastic, low-impact vehicle for delivering those tasty blueberries and healthy fats. Perfect for rewarding good behavior without wrecking their diet!
Share Your Homemade Blueberry and Coconut Gummies for Dogs
I absolutely love seeing your kitchen creations! Once you’ve made your batch of blueberry and coconut gummies for dogs, please pop back over and leave a quick rating. And tell me—did Buster (or your pup!) approve? Sharing photos helps everyone see how great these are!
It’s always encouraged to check out my main dog treat blog for more fun adventures in baking!

Blueberry and Coconut Gummies for Dogs
Ingredients
Equipment
Method
- Pour 1/4 cup of the water into the saucepan. Sprinkle the gelatin powder evenly over the water and let it sit for 5 minutes to bloom.
- Add the remaining 3/4 cup of water and the coconut milk to the saucepan. Heat the mixture over medium-low heat, whisking constantly until the gelatin is completely dissolved. Do not let the mixture boil.
- Place the blueberries into a small blender or use an immersion blender to puree them until smooth. You should have about 1/2 cup of puree.
- Remove the gelatin mixture from the heat. Stir in the blueberry puree until the color is uniform.
- Carefully pour the liquid mixture into your silicone molds. If you have excess liquid, you can save it for a second batch or discard it.
- Place the filled molds in the refrigerator for at least 2 hours, or until the gummies are firm.
- Once set, carefully pop the gummies out of the molds. Store the finished treats in an airtight container in the refrigerator for up to one week.