It’s always such a bummer when the seasons change, and suddenly, every cute treat in sight is covered in pumpkin spice! While we might love those warm autumnal flavors, our pups often don’t tolerate all those heavy spices well. That’s why I’m so excited to share these amazing, savory Dill Pretzels today. They are soft, chewy, and bursting with flavor from dill and garlic powder. When I started MeltItClean, it was because I realized simple, clean ingredients—not fads or heavy spices—are what truly support long-term wellness, and that applies just as much to my furry family as it does to me. These pretzels prove flavor doesn’t need to be complicated!
Understanding Who Needs These Dill Pretzels
If you’re like me, you want the absolute best, safest fuel for your best friend. This recipe is absolutely perfect for the conscientious pet owner. Maybe your dog gets a little sensitive tummy from store-bought snacks, or maybe you just hate reading ingredient labels that look like a chemistry exam!
We are focusing on folks who want delicious, homemade alternatives that skip those trendy, sometimes irritating seasonal mixes, like heavy pumpkin spice blends. These Dill Pretzels give you total control over what goes into their mouths—just good, clean flour, herbs, and yeast. Think of these as intentional, nourishing snacks for your pup!
The Flavor Profile and Style of Our Dill Pretzels
When you make these at home, you get to set the standard! I keep my tone friendly and educational because I want you to feel completely confident feeding these to your dog. The style is super clear and step-by-step, because baking can be intimidating, but these Dill Pretzels are foolproof.
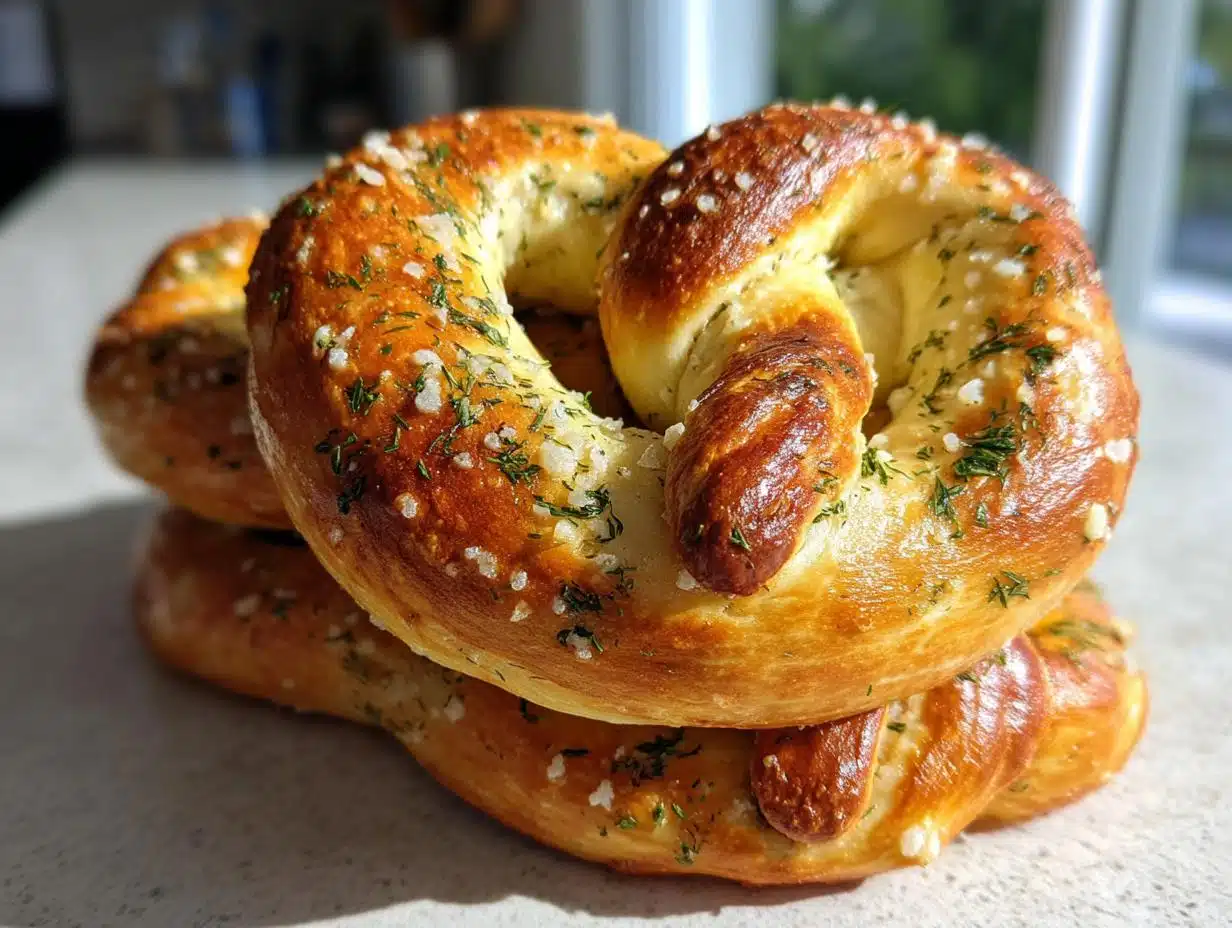
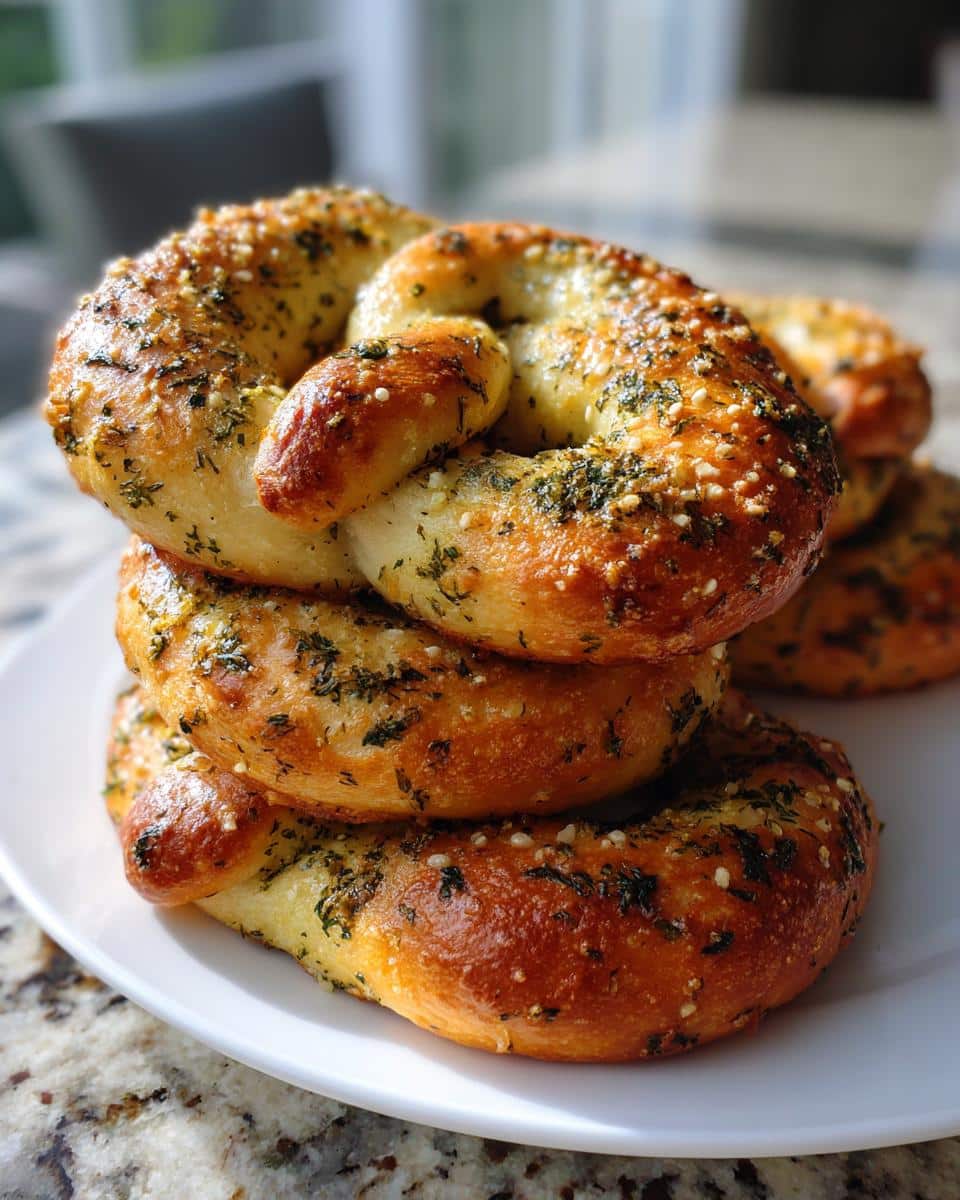
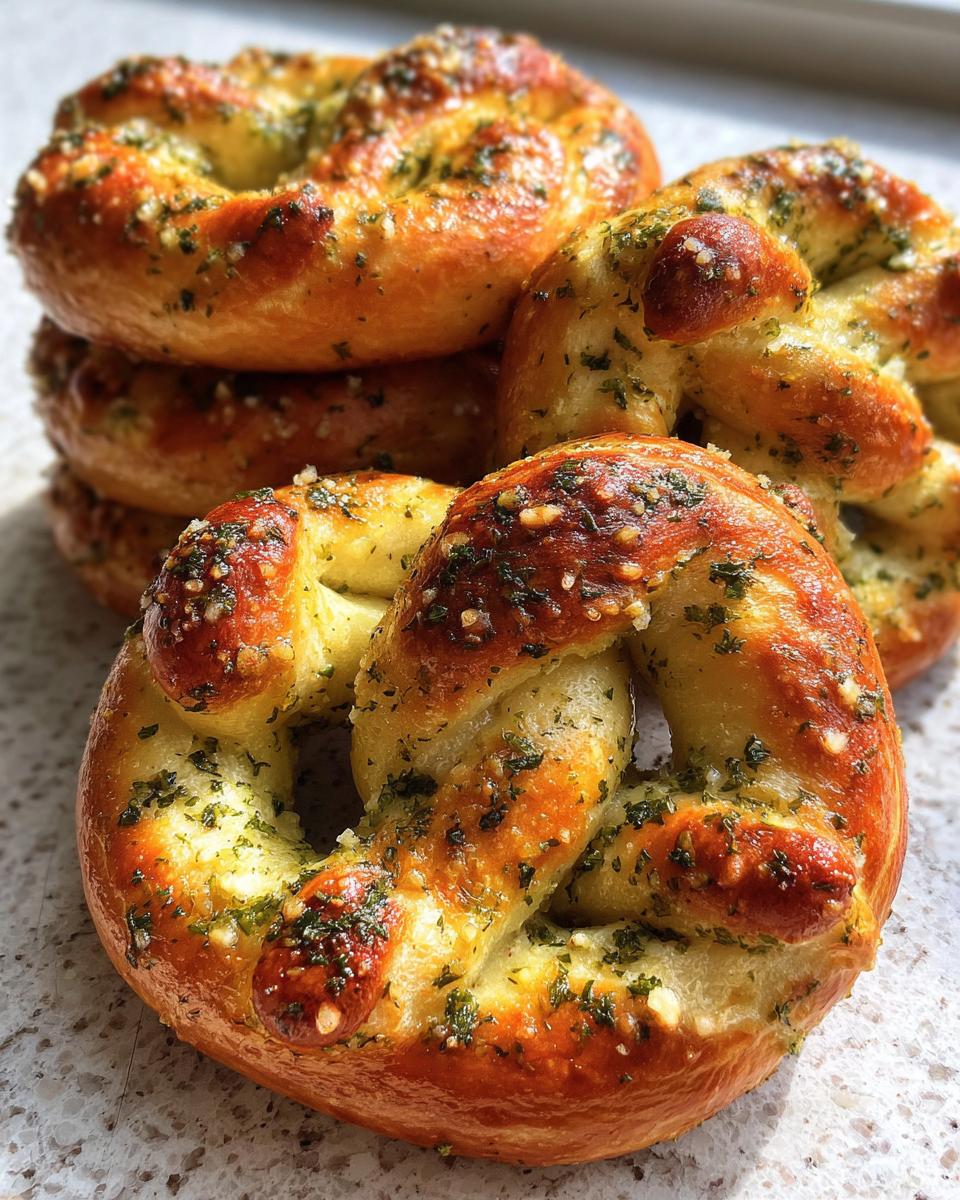
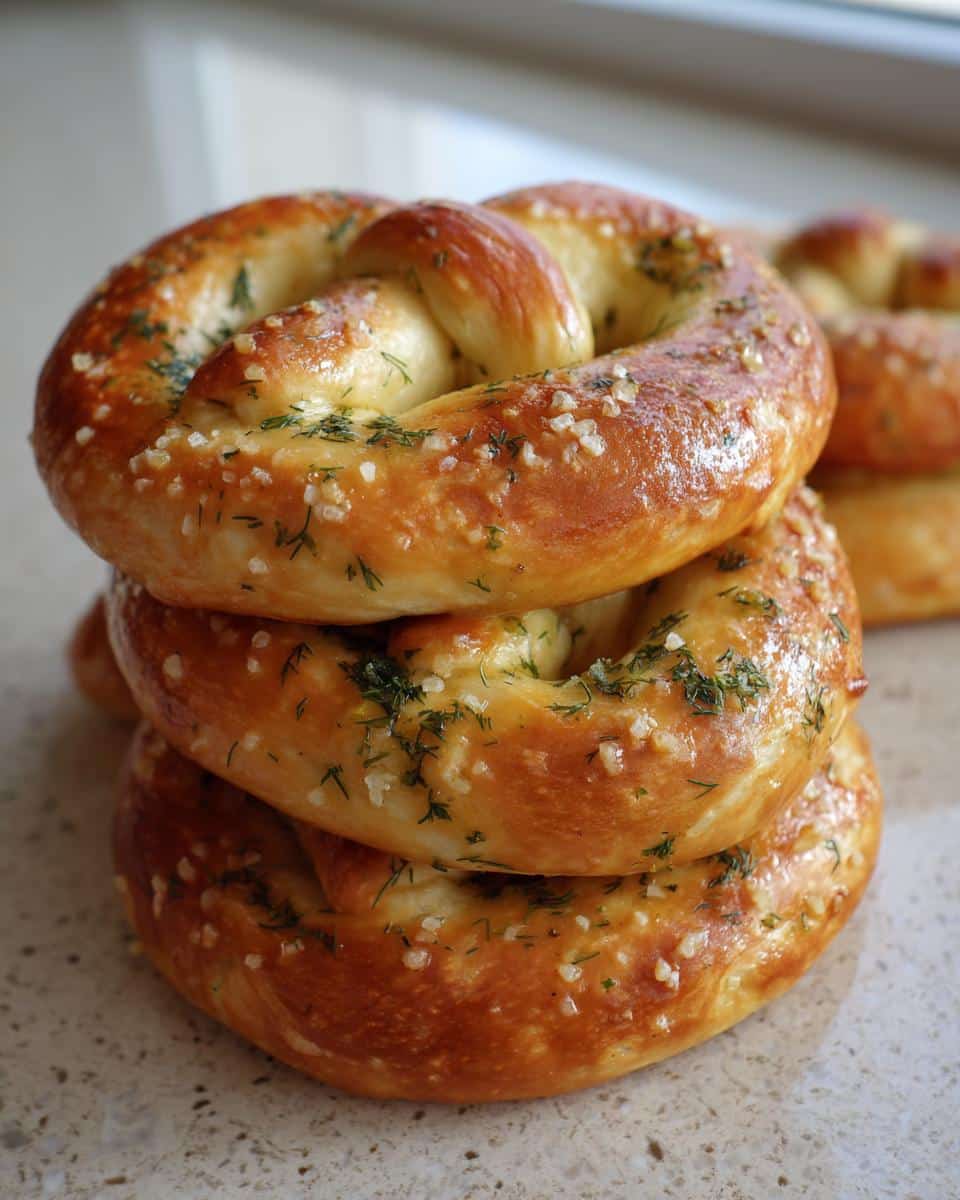
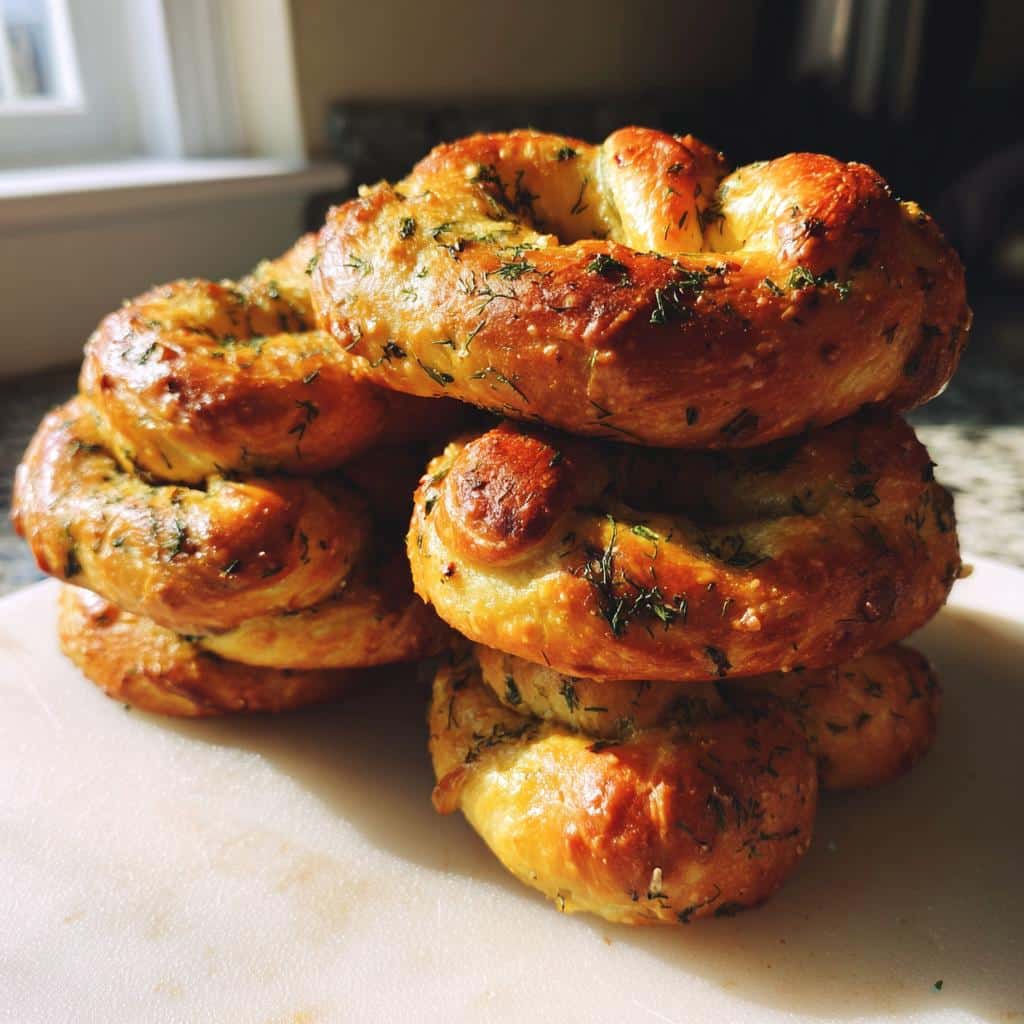
You’re not getting a hard, crunchy biscuit here; trust me, the goal is a wonderfully soft and delightfully chewy texture. The flavor is all about that savory punch of dill weed and warm garlic powder. It’s satisfying for us to make, and dogs absolutely adore the salty, herby break from standard biscuits. That’s why these savory Dill Pretzels are a guaranteed win!
Why These Dill Pretzels Are a Clean-Living Choice
This recipe truly embodies the clean habits I preach over at MeltItClean.com. We skip the questionable additives and definitely wave goodbye to that overwhelming pumpkin spice blend that many pups just don’t need. When you make savory Dill Pretzels, you’re choosing intentional nourishment.
- No artificial colors or preservatives—just simple pantry staples.
- Perfect for dogs with seasonal spice sensitivities.
- That savory flavor profile is addictive for dogs!
Quick Preparation for Your Dill Pretzels
Who has hours to spend on a dog treat? Not me! Seriously, you can have the dough mixed in about 30 minutes, and they are baked and ready for your pup just 15 minutes later. That’s less than an hour total for 8 perfect, soft pretzels!
Pet-Friendly Ingredients in Every Bite
My whole philosophy is supporting your body without restriction, and that extends to our pets. Every ingredient listed in these Dill Pretzels is something you can pronounce and trust. It’s about feeding them food that makes them feel good inside, just like we aim for with our own clean eating!
Gathering Ingredients for Your Dill Pretzels
Okay, before we start braiding our dogs’ new favorite snack, let’s gather everything. I always lay out my ingredients just like I do for my own clean meals—it makes the process so much smoother, especially when dealing with yeast! Remember, precision here guarantees those soft, chewy results we are after, so having your measuring cups ready is key. You want these Dill Pretzels to be perfect for your pup!
We break the ingredients down into three easy sections. First up is the dough base:
- For the Dough: You need 1 1/2 cups of warm water—and I mean *warm*, about 110°F, so it proofs the yeast right! Then, 2 1/4 teaspoons of active dry yeast and 1 teaspoon of sugar to get that yeast happy. After that, four cups of flour (plus extra for dusting!), 2 teaspoons of salt, and 1/4 cup of melted butter.
- For the Boiling Bath: This is crucial for that classic pretzel texture! We need 8 big cups of water mixed with 1/2 cup of baking soda. Don’t skip the soda; it helps develop the crust.
- For the Topping: This is the star! Mix 1/4 cup melted butter with 1 tablespoon of dried dill weed (use the good stuff!), 1 teaspoon of garlic powder, and 1 teaspoon of salt.
Step-by-Step Instructions for Perfect Dill Pretzels
Now for the fun part! Anyone can follow a list, but watching the dough transform—that’s where the magic happens. These instructions are designed to make sure your Dill Pretzels come out bakery-quality chewy every single time. No stress, just follow my hands!
Making the Dough and First Rise
First things first, get that yeast activated! Find a large bowl and mix your warm water (remember, warm like a nice bath, not scalding hot!), the yeast, and the sugar. You need to let that sit for about 5 minutes. If you don’t see foam on top, your yeast is grumpy, so start over. The foam is your green light!
Once happy, toss in the flour, salt, and the 1/4 cup of melted butter. Mix it up until it looks a bit shaggy, then dump it onto your counter. Knead by hand for a solid 5 to 7 minutes until it feels springy. Pop it into an oiled bowl, cover it up tight, and let it rest in a cozy spot for a full hour. It needs that time to double up!
Shaping and Boiling the Dill Pretzels
While that dough is enjoying its rest moment, preheat your oven to 425°F (220°C) and get your baking sheets lined with parchment paper—we don’t want any sticking drama later!
Deflate the dough gently and divide it into 8 equal spots. Roll each one out long—we’re talking roughly 24 inches long. Twist it into that classic pretzel shape. Now, for the texture secret: bring your 8 cups of water and the baking soda to a rolling boil in a large pot. Carefully—and I mean carefully!—drop 2 or 3 pretzels in at a time. They only need 30 seconds in that bath. Use a slotted spoon to fish them out and place them right onto your lined sheets.
Baking and Applying the Dill Topping
Get those boiled beauties in the oven for about 12 to 15 minutes. You want them golden brown and smelling incredible! While they are baking away, quickly whisk together that leftover 1/4 cup of melted butter with the dill weed, garlic powder, and salt.
The second they come out of the 425°F heat, grab a pastry brush, and smother those hot Dill Pretzels generously with that herby butter. That immediate heat helps the topping soak right in and lock in that amazing savory flavor!

Tips for Success with Your Homemade Dill Pretzels
Baking is chemistry, but using whole, clean ingredients lets you play a little bit, which I love! When making these Dill Pretzels, you’ll find the process goes smoother if you pay attention to a few key things. It’s about supporting the process, not fighting it!
First up: the yeast. If your water is too hot, it kills the yeast, meaning no lovely rise and flat, sad pretzels. Too cold, and it just sleeps! That 110°F sweet spot is essential. If you see that beautiful foam after five minutes, you’ve won the first battle.
Next, the dough itself. After kneading, it should definitely feel elastic but still slightly tacky—if you find it’s sticking way too much to your hands, dust on a *tiny* bit more flour, but be careful! Too much flour and your soft pretzels turn into crackers. We are aiming for chewy, remember?
Finally, let’s talk flavor! My recipe uses 1 tablespoon of dried dill, but as the note says, you can tweak this. If you want your pup to really taste that savory green burst, add another half-teaspoon, especially if your dill has been sitting in the cupboard for a while. You want that wonderful, fresh smell coming off the finished Dill Pretzels!
Storage and Reheating Dill Pretzels
I know you’ll probably feed most of these the day you make them—they smell THAT good, even to us humans! But if you have leftovers, storing them properly keeps them soft. Keep your Dill Pretzels in a completely airtight container at room temperature. Don’t stick them in the fridge; that makes them go hard fast!
If they do firm up a bit overnight, the best trick is the microwave! Just zap one or two for about 10 to 15 seconds. That little bit of steam brings back all that wonderful, soft chewiness we worked so hard for. Enjoy the leftovers!
Frequently Asked Questions About These Treats
I always get questions when I post something new, especially when it comes to our pets! We want to make sure these savory Dill Pretzels are perfect and safe. These treats are made with simple, recognizable ingredients, but here are the things folks ask about most often!
Are Dill Pretzels safe for puppies?
Generally, yes! Since these use standard pantry items and avoid any harsh spices, they are fine for older puppies. However, because they are yeast-based and chewy, I would introduce them slowly to very young pups. If your dog has a sensitive digestive system, start small to see how they handle the bread base!
Can I substitute the flour? What about a gluten-free option?
That’s a tough one! The main texture of soft pretzels relies heavily on the gluten structure in all-purpose flour. Trying to swap it out for something like almond or coconut flour will completely change the texture—you’ll end up with a crumbly dog biscuit, not a soft Dill Pretzel. For bread-like texture, stick with the AP flour for this specific recipe.
My dog cannot have salt. Can I leave it out of the topping?
Absolutely! Salt is mostly for enhancing the flavor for us, but we always put our dogs first. You can completely omit the teaspoon of salt from the topping mixture. The flavor from the yeast and the garlic powder will still be plenty noticeable for them!
Do these Dill Pretzels have to be baked right away?
The dough needs that first rise, but after that, you can hold off briefly. If you want to shape all the dough but aren’t ready to boil them yet, you can cover the shaped pretzels lightly and pop them in the fridge for an hour or two. Don’t let them sit for too long, though, or they might get too puffy before the boil!
Share Your Pumpkin Spice-Free Pup Buttons
I genuinely hope you love making these savory Dill Pretzels as much as I love making them for my own crew! When you try this recipe, please let me know how they turned out, and leave a rating over on the recipe card. Sharing these simple, intentional habits is what MeltItClean is all about, and seeing your pup enjoy these delicious Dill Pretzels makes my day!
By EMILIA, founder of MeltItClean.com
Hi, I’m EMILIA, the founder of MeltItClean.com – your digital space for natural weight loss, real wellness habits, and clean-living inspiration that actually fits your life. Learn more about my journey here.
For years, I struggled with the ups and downs of dieting. I tried everything — juice cleanses, low-carb crazes, fitness challenges — but I always ended up back where I started: tired, bloated, and frustrated. I didn’t just want to “lose weight” — I wanted energy, mental clarity, glowing skin, and confidence without sacrificing my joy or sanity.
After years of experimenting, learning, and unlearning, I discovered a simple truth: your body is already powerful — it just needs support, not restriction. That’s when I created Melt It Clean — a site dedicated to real transformation through clean, intentional, and nourishing daily habits that anyone can follow.
My goal was simple: build a place where people could feel informed, supported, and empowered without being overwhelmed by wellness fads.
Dill Pretzels
Ingredients
Equipment
Method
- In a large bowl, combine the warm water, yeast, and sugar. Let stand for 5 minutes until foamy.
- Add the flour, salt, and 1/4 cup melted butter to the yeast mixture. Mix until a shaggy dough forms. Knead on a lightly floured surface for 5 to 7 minutes until smooth and elastic.
- Place the dough in a lightly oiled bowl, cover, and let it rise in a warm place for 1 hour, or until doubled in size.
- Preheat your oven to 425°F (220°C). Line baking sheets with parchment paper.
- Divide the dough into 8 equal pieces. Roll each piece into a long rope, about 24 inches long. Shape each rope into a pretzel shape.
- In a large pot, bring 8 cups of water and 1/2 cup baking soda to a boil. Carefully drop 2 or 3 pretzels at a time into the boiling water for 30 seconds. Use a slotted spoon to remove them and place them on the prepared baking sheets.
- Bake for 12 to 15 minutes, or until golden brown.
- While the pretzels bake, mix the 1/4 cup melted butter, dill weed, garlic powder, and 1 teaspoon salt in a small bowl.
- Brush the hot pretzels generously with the dill butter mixture immediately after removing them from the oven.